


SIG Komander
 11-07-2022, 02:38 PM
#376

Here is a link of a you tube video I posted https://www.youtube.com/watch?v=2LVIqY9xVws
It is yet to be covered but could not wait any longer to get it air born as winter is rapidly approaching. A gem to fly and very agile in my case. Mind you mine has a reduced dihedral and wider ailerons so it is very agile and has some pattern plane flight characteristics.
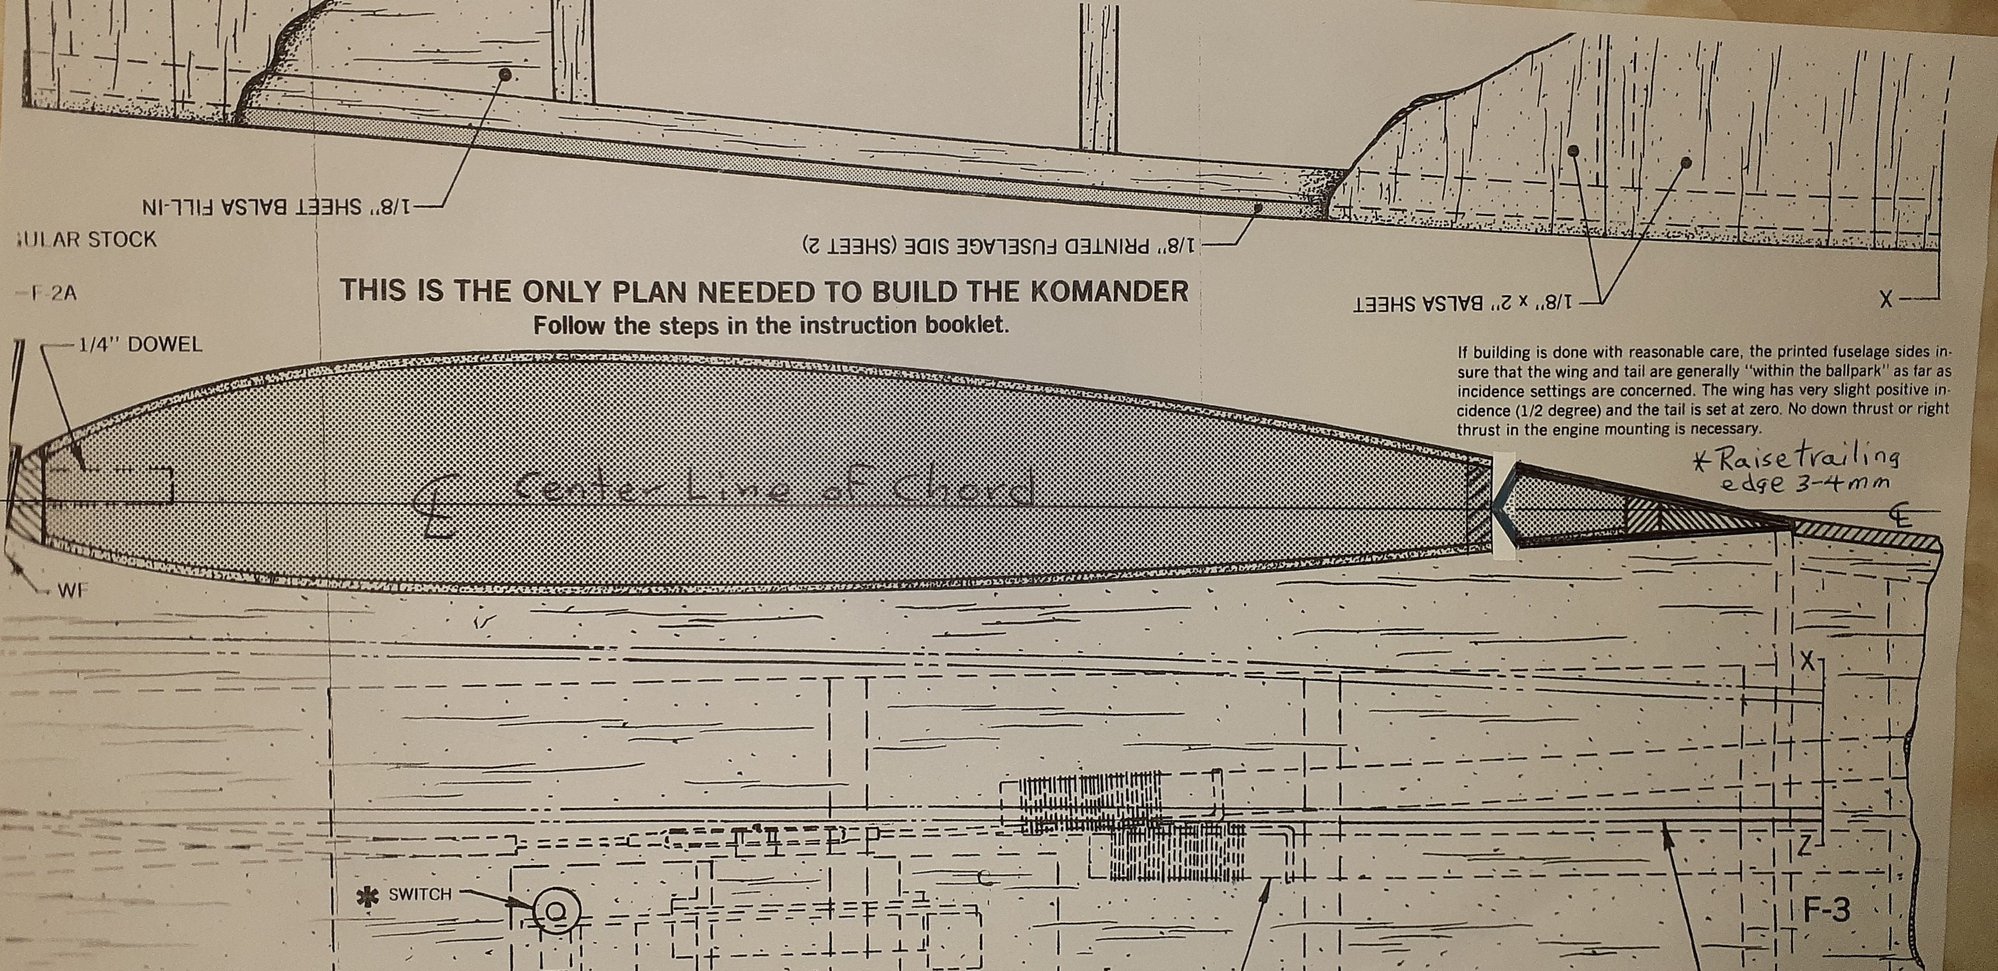
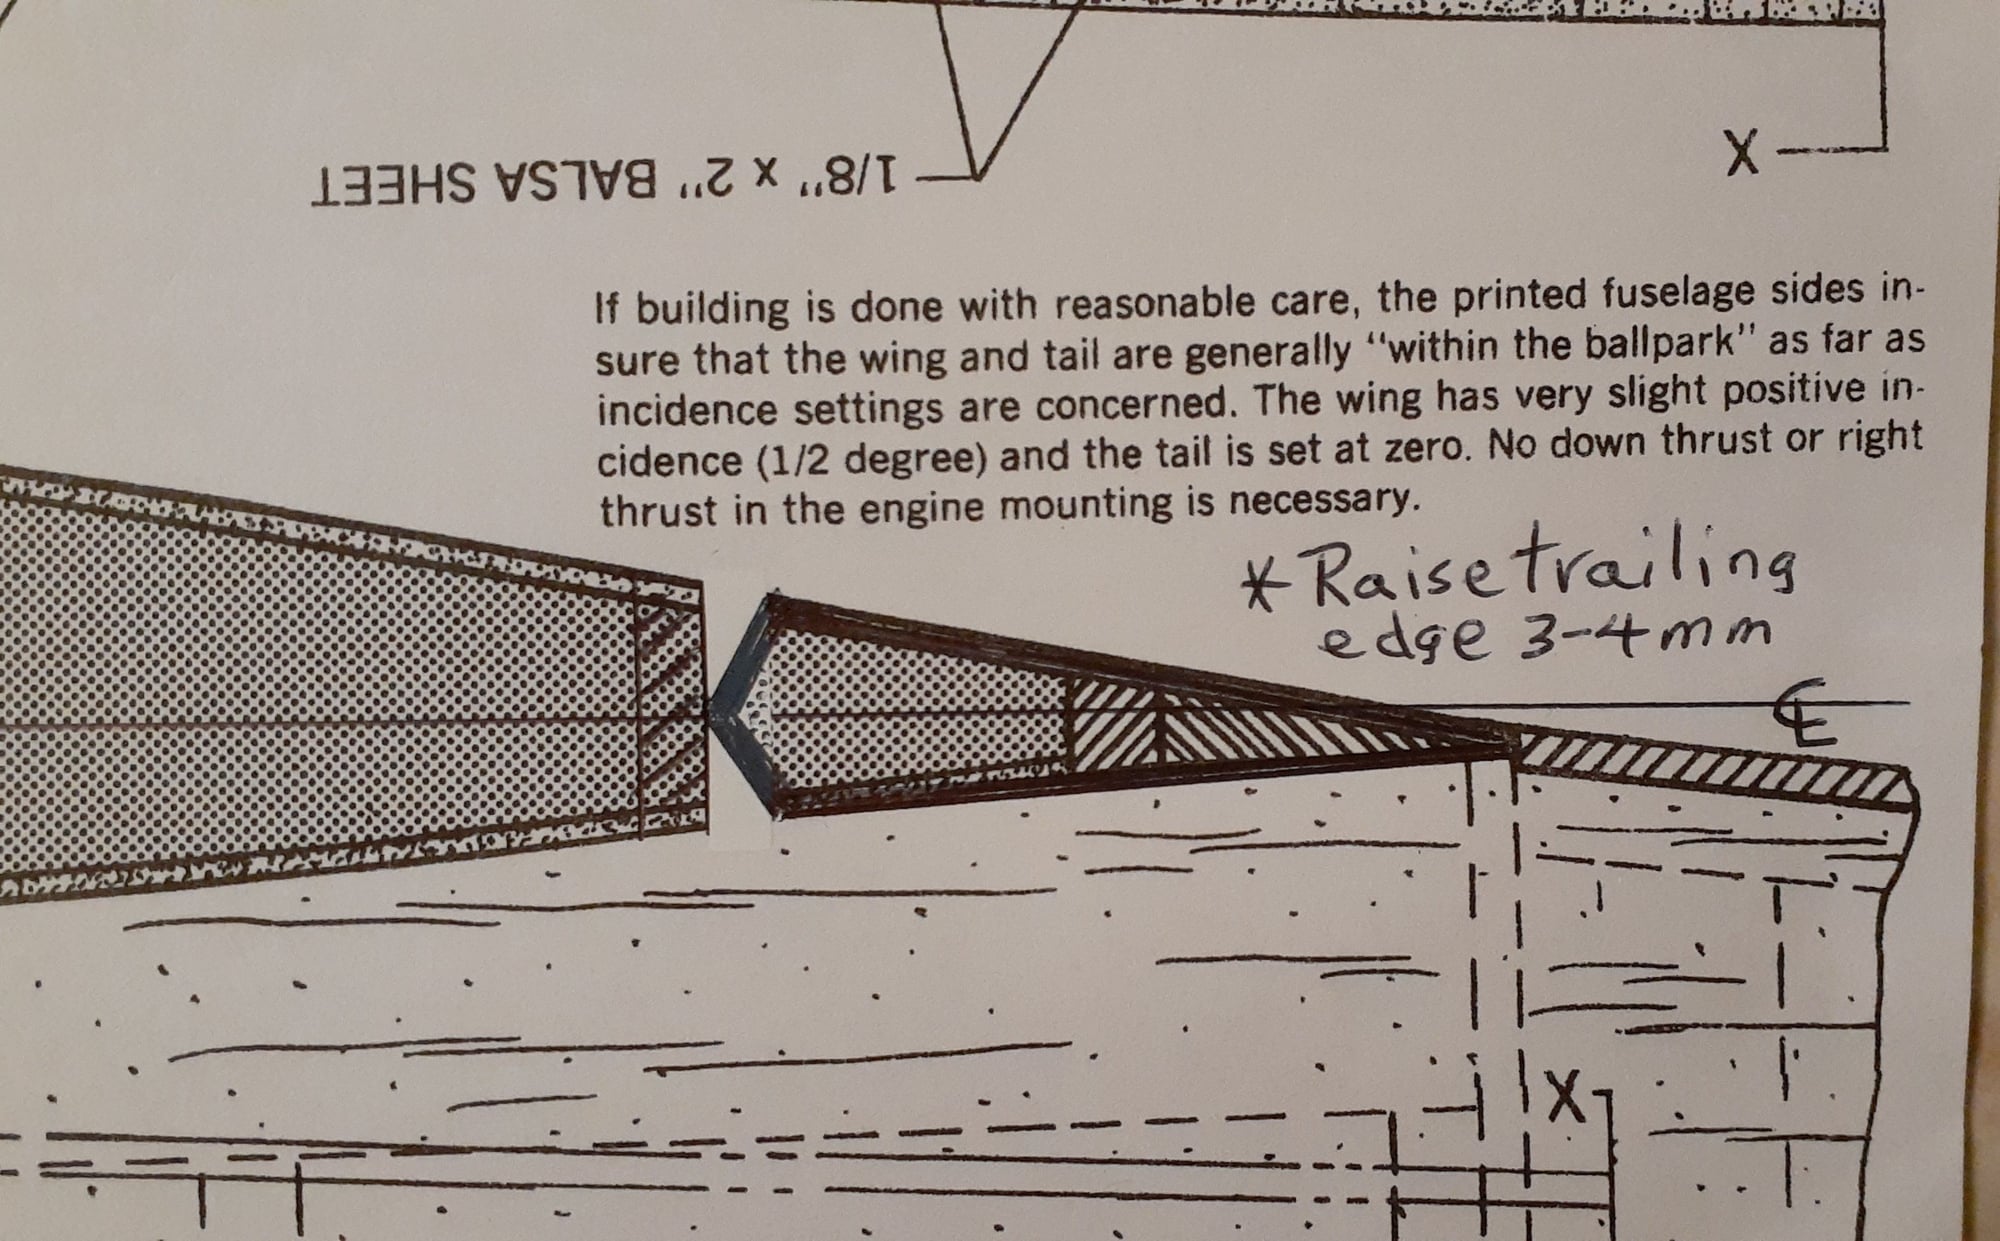
I do have a question. With the horizontal stabilizer which is considered to be at 0.0 degrees, what is the angle of incidence at the of the main wing next to the fuselage on your plane. I am getting +1.8 degrees and I read that it was designed to be + 0.5 degrees. It was zooming up when I increased throttle. There is no down thrust or up thrust on it nor right thrust for that matter. Afterwards, did raise the trailing edge 4mm with a rubber spacer which reduced the main wing incidence to approximately +1.0 degree and the zooming stopped, seemed to need bit less throttle to fly level and it seemed to even land more gently, all good signs.
Also, measured with the incidence meter that it has 1 degree of washout at the wing tip which is as per the design.
Oh, at what is the weight of your plane ready to fly. Mine is at so far at 6.75 lbs, uncovered.
I am happily getting 7 minutes with 5000 mah 5s and 4s batteries and APC 12x 8 electric prop. Power 46 motor.
Thank you for your replies.
It is yet to be covered but could not wait any longer to get it air born as winter is rapidly approaching. A gem to fly and very agile in my case. Mind you mine has a reduced dihedral and wider ailerons so it is very agile and has some pattern plane flight characteristics.
I do have a question. With the horizontal stabilizer which is considered to be at 0.0 degrees, what is the angle of incidence at the of the main wing next to the fuselage on your plane. I am getting +1.8 degrees and I read that it was designed to be + 0.5 degrees. It was zooming up when I increased throttle. There is no down thrust or up thrust on it nor right thrust for that matter. Afterwards, did raise the trailing edge 4mm with a rubber spacer which reduced the main wing incidence to approximately +1.0 degree and the zooming stopped, seemed to need bit less throttle to fly level and it seemed to even land more gently, all good signs.
Also, measured with the incidence meter that it has 1 degree of washout at the wing tip which is as per the design.
Oh, at what is the weight of your plane ready to fly. Mine is at so far at 6.75 lbs, uncovered.
I am happily getting 7 minutes with 5000 mah 5s and 4s batteries and APC 12x 8 electric prop. Power 46 motor.
Thank you for your replies.
 11-07-2022, 05:49 PM
#377
Join Date: May 2013
Location: Moncton, NB, CANADA
Posts: 56
Likes: 0
Received 0 Likes
on
0 Posts
11-18-2022, 01:39 PM
#378
Join Date: May 2013
Location: Moncton, NB, CANADA
Posts: 56
Likes: 0
Received 0 Likes
on
0 Posts
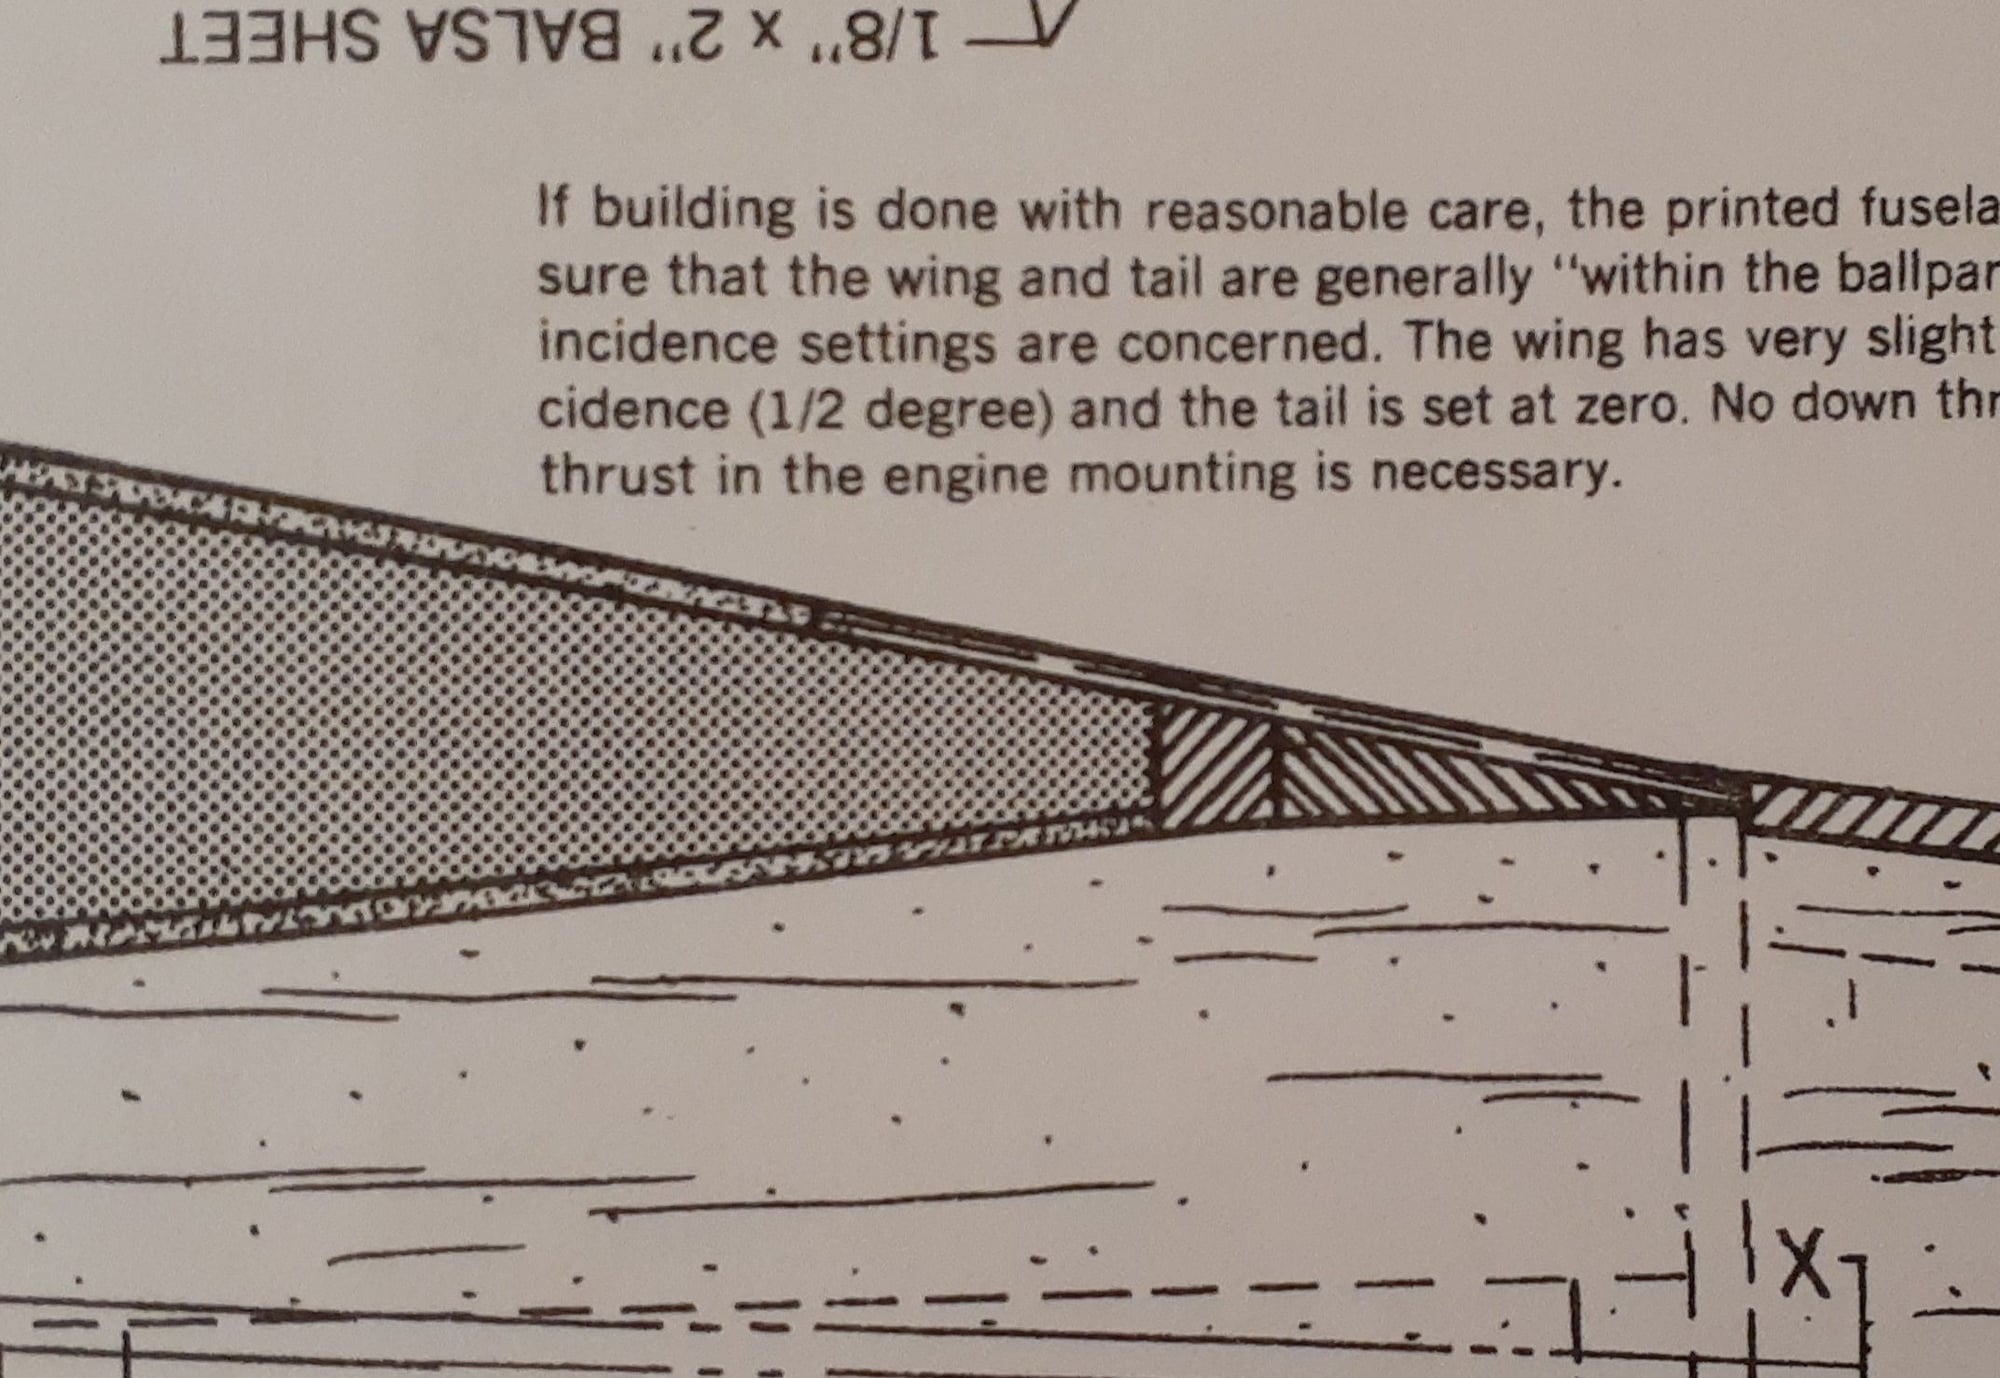
On my plane the aileron is very wide at 2.25 inches and would also result with a misleading measured angle of incidence and even more flaperon effect in flight. All that said, I need to start again and measure the angle of incidence of the wing chord with the aileron removed which should give a more accurate result. It is very likely that I will find the angle of incidence to be less than 1 degree at the root or even at the +0.5 degree per design. For the next flight in the spring, I will trim up the aileron trailing edge of the aileron to be in line with the center line of the chord which will remove any flaperon effect it had been imparting on the wing.
Regardless of the above, there is one thing I did try in the field. I raised the trailing edge of the wing by 3.5 mm and a second time by 4.5 mm with rubber spacers. We found the wing to be very tolerant to incidence changes as the plane still flew well but keep in mind that the aileron was not trimmed up as is recommended in the instruction manual, the flaperon effect imparted by the aileron was still there. When i do test fly again there will be no spacers and the ailerons will be trimmed up to be in line with the center of the chord to cancel out any flaperon effect.
The first two drawings closely resemble my plane. Note how the center line of chord runs higher than the aileron trailing edge. The third photo is the original design where the flaperon effect is more easily seen and hence the need for up trim.
Last edited by Creative RC; 11-18-2022 at 03:16 PM.
12-05-2023, 12:07 AM
#379
Join Date: Feb 2012
Location: Kelowna,
BC, CANADA
Posts: 9
Likes: 0
Received 0 Likes
on
0 Posts
Well, I bought my first Komander back in the late summer of '73... yup, a long time ago. I was just 16 and had been flying a few rc sailplanes. Then I bought the World Engines Expert 7, based on all of those wonderful W.E. ads and added a YS60 to the mix. Thus my first motorized rc plane was born. The YS60 (the original, with the side exhaust muffler - either closed or open front cap) was definitely a screamer and, as YS engines were, more powerful than the rest. Defintely the proper setup for a "Trainer".
I flew the plane for a few summers back when I was still in Montreal. Sometime in '80 I messed up and flew it vertically into the ground at full bore. Yup. Saving grace was that the ground was somewhat soggy. It nosed in perfectly straight - smashing the prop, the cowling and burying itself into the ground just past the root leading edge.
There it was- the tail sticking up like a post, the wing still in one piece. It took a while to dig 'er out, but the fuselage aside from the cowl was still intact. No fuel seepage. No cracks in the fuselage / wing or tail. I could hardly believe it. However, when I went to clean the engine out I found that the crankshaft now had a couple of cracks internally. Bummer. Engine 0 . Plane 1 .
Fast forward a year and I got a new job overseas, so I loaned the airframe to a buddy who installed his own engine and flew it for a few more years. When he was done with it, he gave it back to my dad, who hung it in the covered sunroom for a number of years. It must have fallen down from there a few times and when I returned after 13 years, the plane was beaten up.
Death in storage.
So, back in the late 90's I scored another Komander on the bay and have had it until now in the box, started by the previous owner (one wing half sheeted), but otherwise just as it was put in the box at SIG.
Me thinks it's about time to build this one up , possibly as a tribute model to my first one. This time, even though I now have about a dozen YS engines of various sizes and side/rear exhausts, I think I will go electric. I like what creative rc did on his, but will only halve the amount of dihedral from the original.
Looking forward to starting this journey over the coming winter.
Last edited by CoolCanuck; 12-05-2023 at 12:19 AM.


