


Ziroli 1/6 Hellcat Build
 05-29-2024, 07:06 AM
#376

It appears that you are on the money with your perception of that assembly . Do you feel the need to duplicate that in 1/6 scale?
For me, I'm reassessing my suggestion of the Dolphin spot putty. Just too troublesome to use for the application.
I've gone back to s
3m red spot putty or even easier, wet, brushable spackling.
For me, I'm reassessing my suggestion of the Dolphin spot putty. Just too troublesome to use for the application.
I've gone back to s
3m red spot putty or even easier, wet, brushable spackling.
 06-01-2024, 08:31 AM
#377

Thread Starter
It appears that you are on the money with your perception of that assembly . Do you feel the need to duplicate that in 1/6 scale?
For me, I'm reassessing my suggestion of the Dolphin spot putty. Just too troublesome to use for the application.
I've gone back to s
3m red spot putty or even easier, wet, brushable spackling.
For me, I'm reassessing my suggestion of the Dolphin spot putty. Just too troublesome to use for the application.
I've gone back to s
3m red spot putty or even easier, wet, brushable spackling.
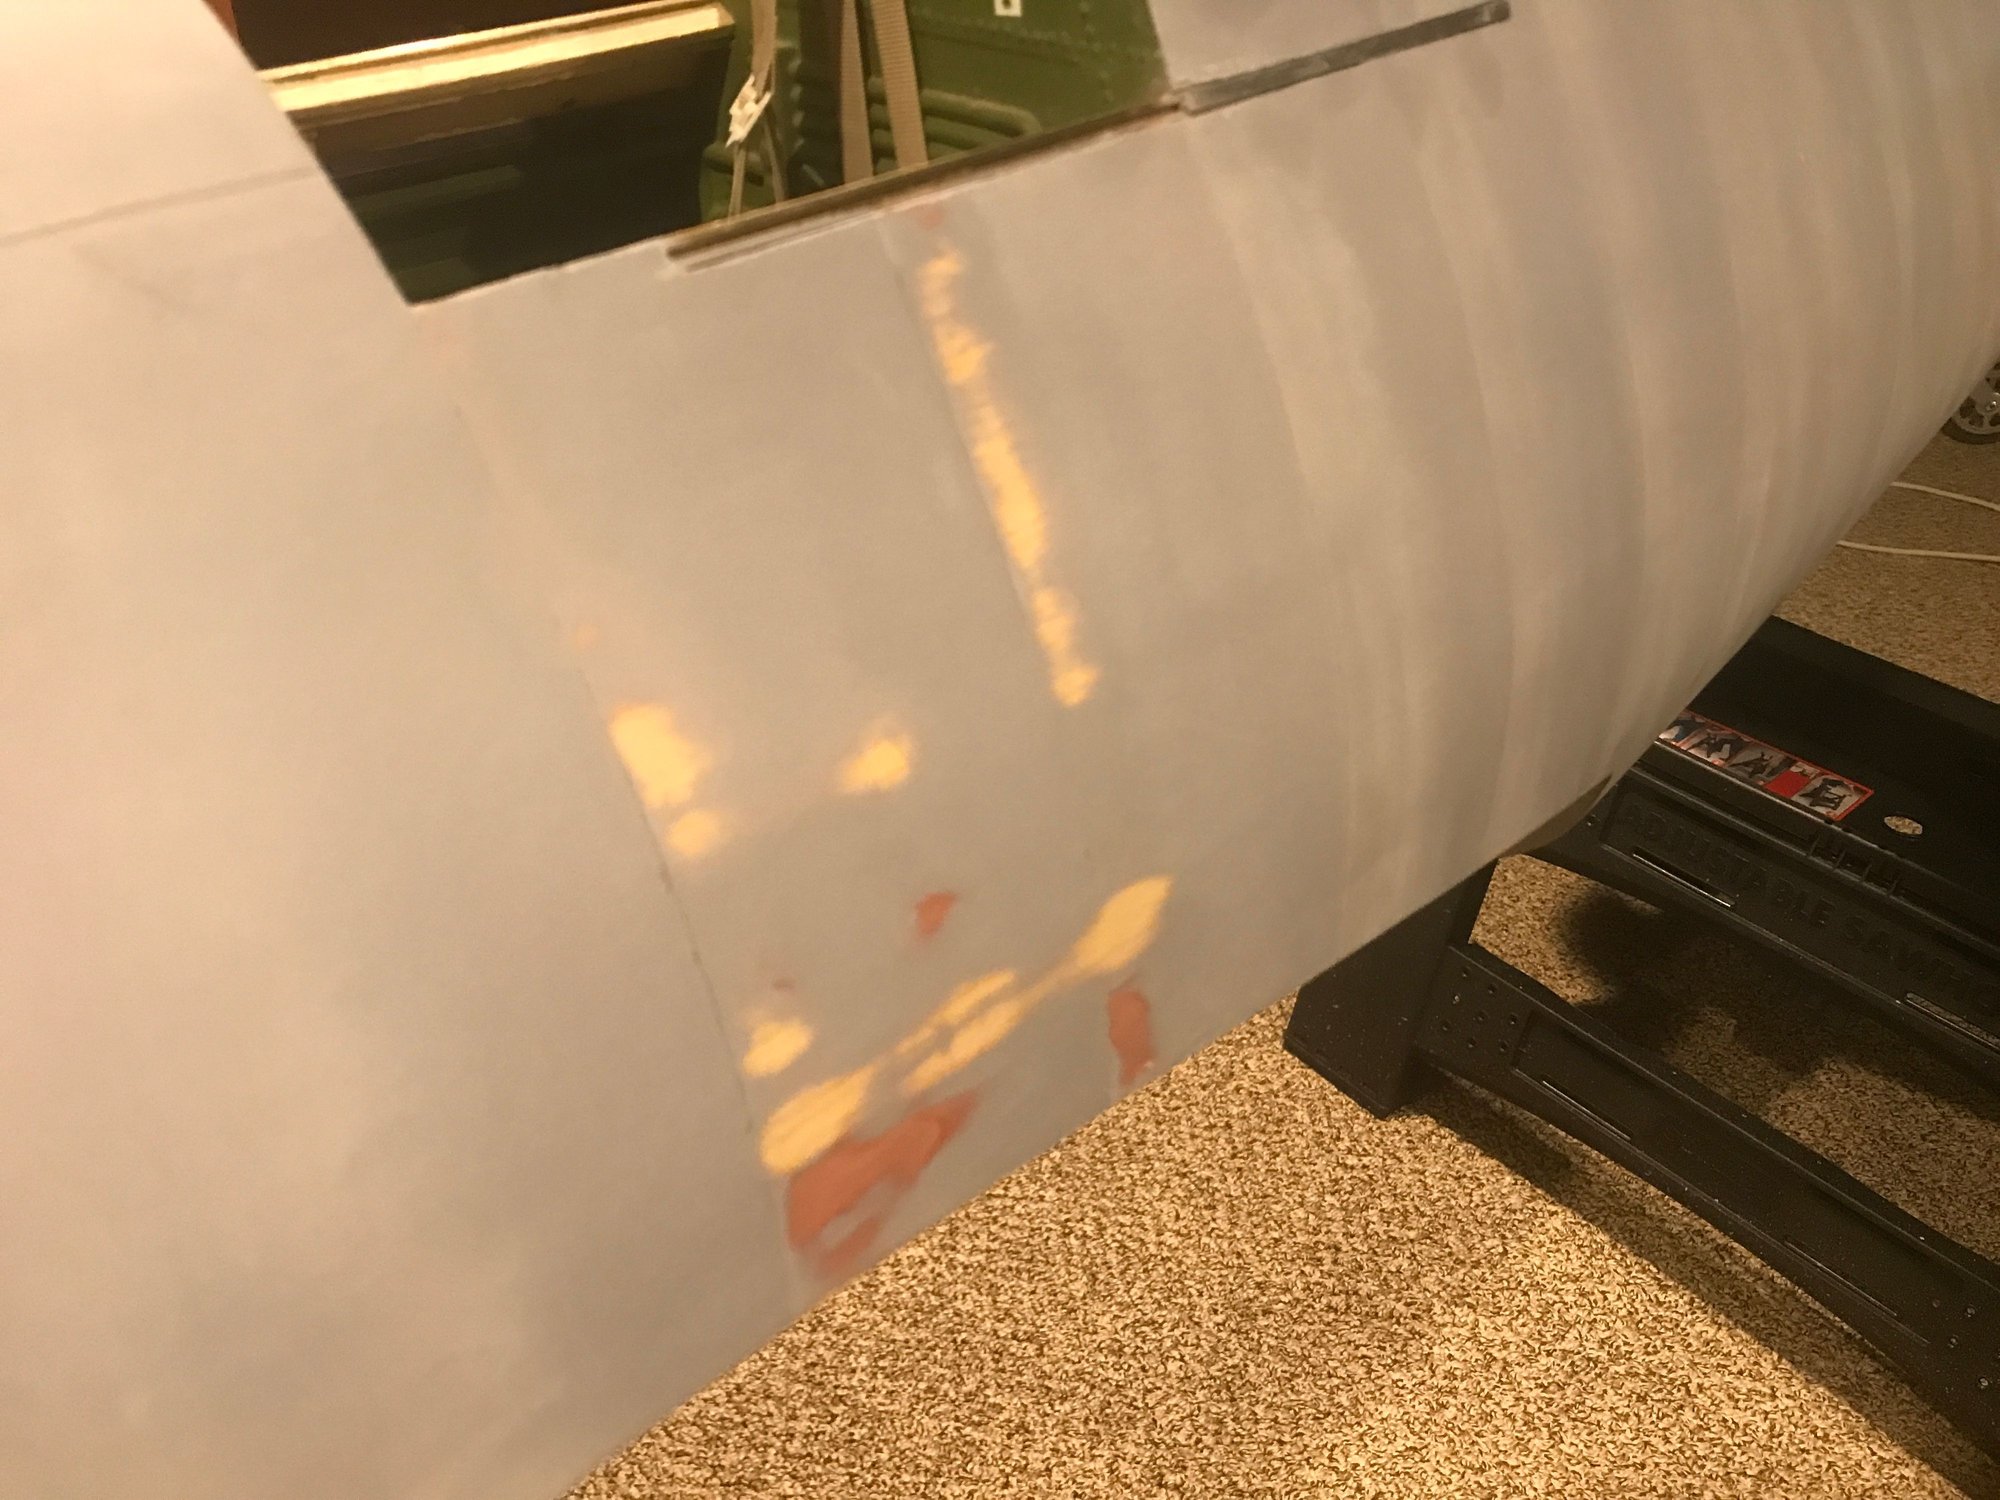
Regarding the tail cone: I did think about leaving it off, as I did leave off the butt joint along the center, bottom fuse - few will ever see that part of the plane and I would have needed to interrupt the line in 4 places for Mirce's details: 3x for placement of the 3 identification light details and 1x for the center bottom panel. I made a decision to leave this off - too much work for something practically no one will ever see, let alone notice that it is not there if/when they do see it. For the tail cone, I thought the lines were interesting and pretty easy to replicate. Certainly more visible than the bottom of the aircraft. Plus, when moving the rudder, one will be able to see the line and rivets/screws that are normally hidden - kind of a "Wow, he even did that!" feature, readily visible for little effort.
So, here it is! The angled line appears a bit thin due to lighting - it's there! Feels like a major milestone has been reached, as all the priming/lining is complete. Finally! Wet sanding, screw/rivet details will take some time, but it feels like the final stretch. Well, I do have a few access covers and landing gear covers, that will need priming, but those are nothing in comparison.
I received some good feedback from My Perfect Color. All of their paints are water based acrylics, including their spray cans. That will make the wife happy (low VOC). I think I'm going to give them a try, ordering enough to do at least 2 coats so that I don't run short and risk shade differences between lots.
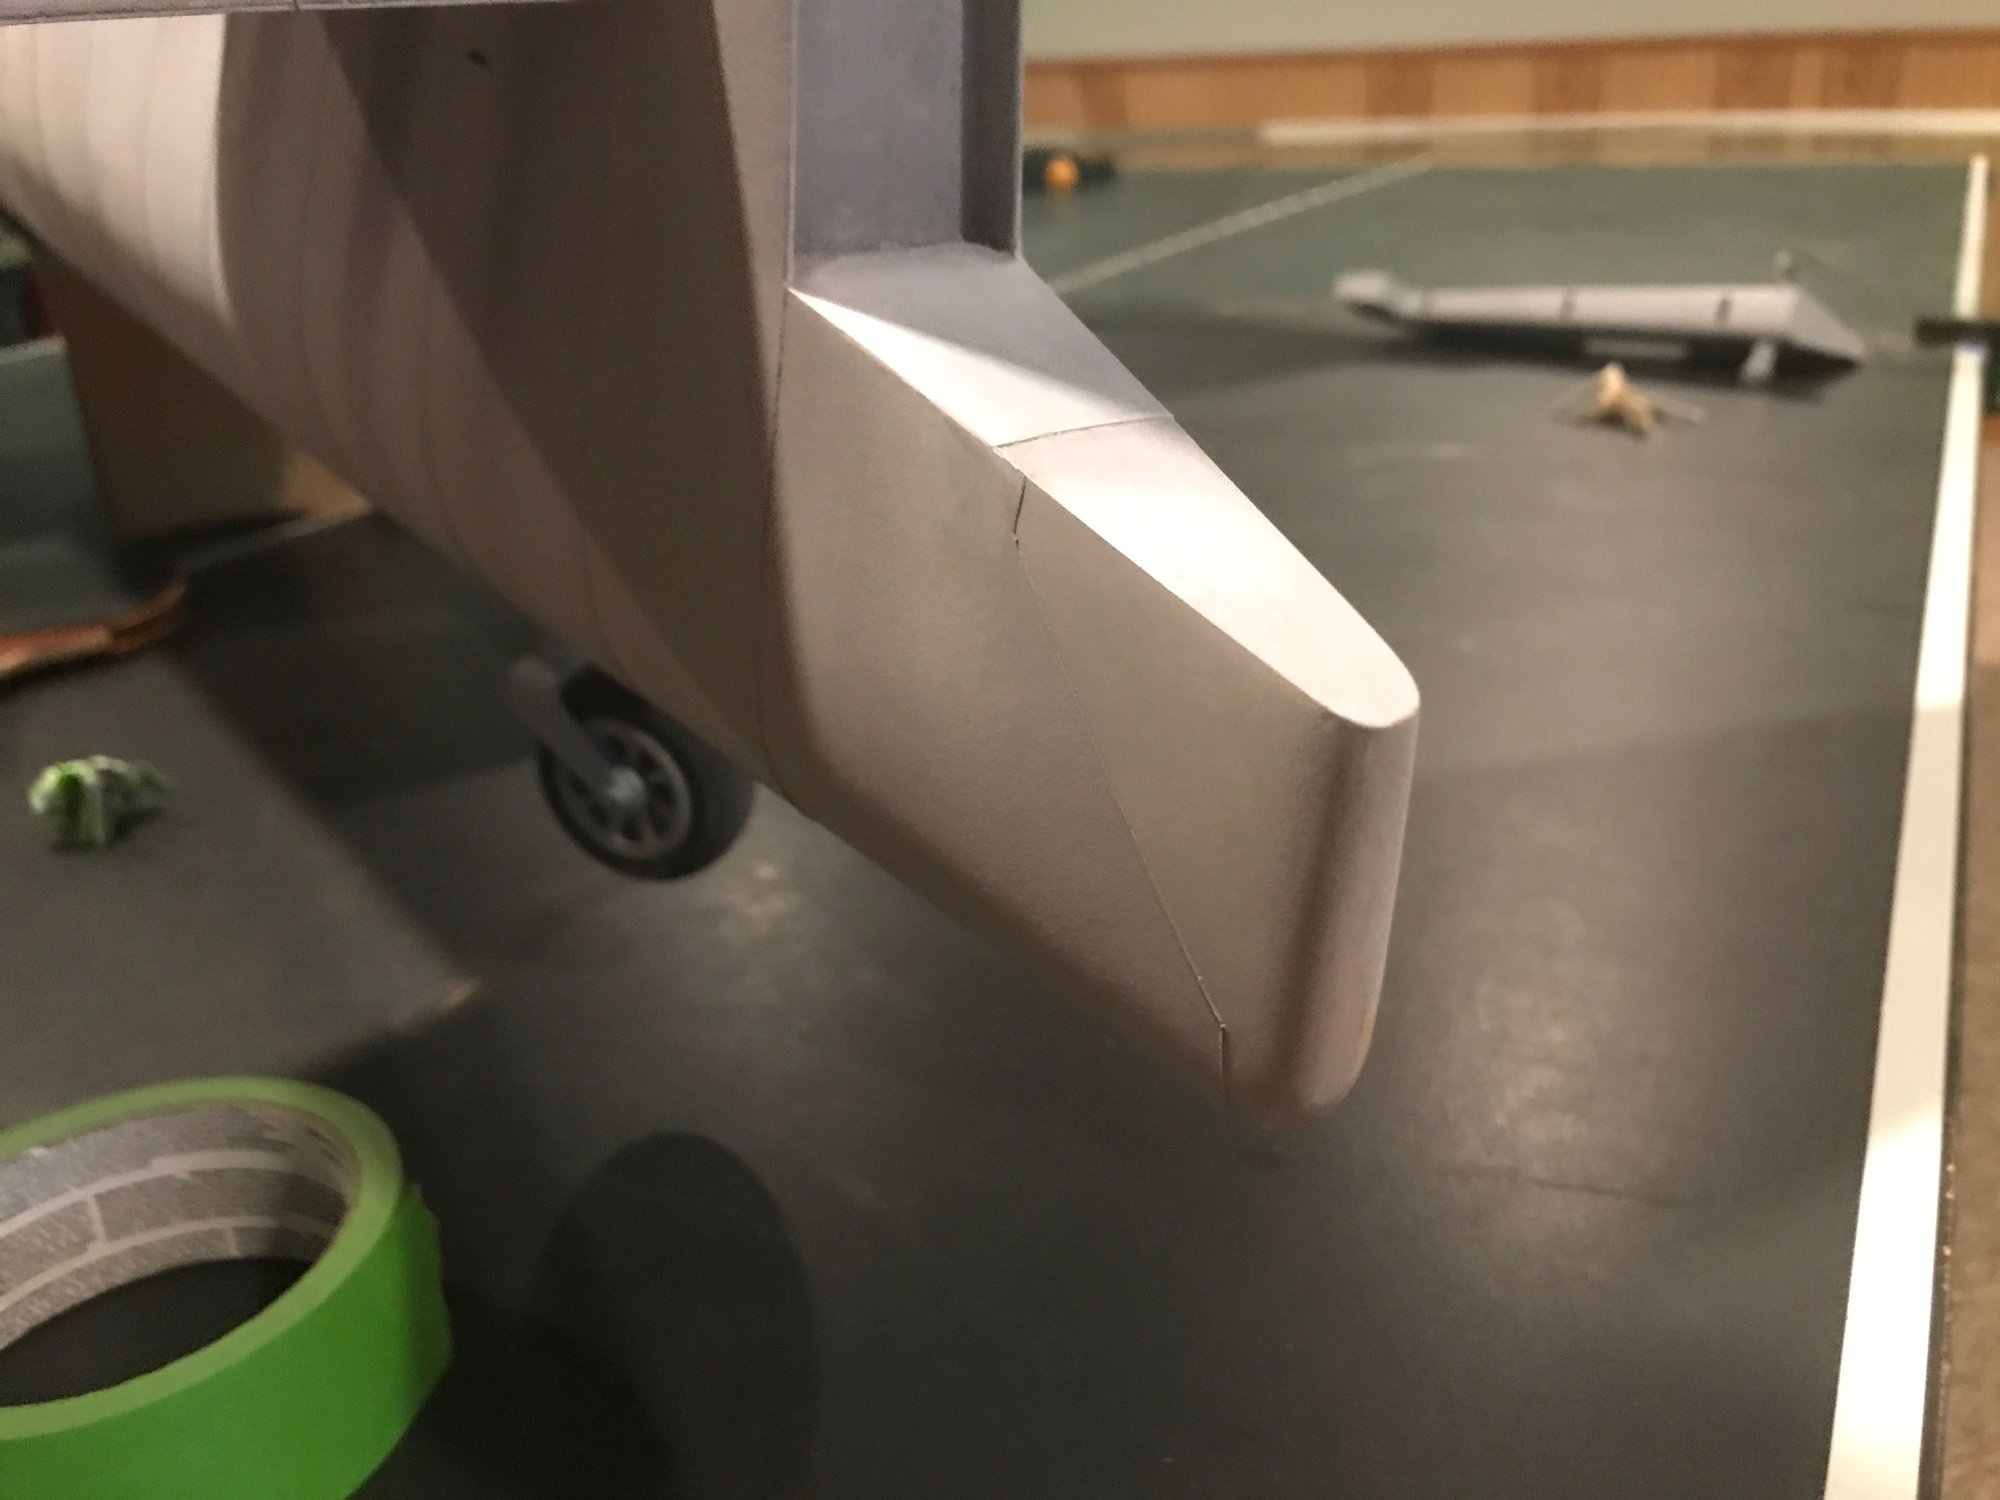
Tail cone lines - last of the priming/lining! The 45degree line is there - lighting position appears to be filling in the top edge of the line, whereas a shadow is being formed from the vertical lines.
06-01-2024, 09:21 AM
#378
Ha, ha... Yeah you got it.
As for the panel lines, I tried spackling but not nearly durable enough. I can rub them off with my thumb. I have plenty of body fillers and the Dolphin will work but is a little more trouble. Mixing, sanding afterwards, proper ratios, etc.
Now, since the tape is still in place, I want to experiment with just using a thick primer.
How many times after priming or painting have you had an unwanted paint line after removing masking tape?
If that doesn't work, back to Dolphin.
As for rivets, what are you doing?
06-01-2024, 04:30 PM
#379
Thread Starter
Ha, ha... Yeah you got it.
As for the panel lines, I tried spackling but not nearly durable enough. I can rub them off with my thumb. I have plenty of body fillers and the Dolphin will work but is a little more trouble. Mixing, sanding afterwards, proper ratios, etc.
Now, since the tape is still in place, I want to experiment with just using a thick primer.
How many times after priming or painting have you had an unwanted paint line after removing masking tape?
If that doesn't work, back to Dolphin.
As for rivets, what are you doing?
As for the panel lines, I tried spackling but not nearly durable enough. I can rub them off with my thumb. I have plenty of body fillers and the Dolphin will work but is a little more trouble. Mixing, sanding afterwards, proper ratios, etc.
Now, since the tape is still in place, I want to experiment with just using a thick primer.
How many times after priming or painting have you had an unwanted paint line after removing masking tape?
If that doesn't work, back to Dolphin.
As for rivets, what are you doing?
For my panel lines, I used Rustoleum Automotive Filler/Primer. I found 3 coats, drying between coats, to work well enough for my purposes. Also, I found that leaving it overnight to dry before removing the tape produced best results. I found that with multiple coats, the top coat could be dry to the touch by the underlying coats could still be damp if not given enough dry time. A Bondo spray filler/primer had been recommended, but I couldn't find any in stock anywhere, maybe a can or two here and there across the state. The Bondo website didn't list it - perhaps it's no longer in production? I didn't know how much I needed and didn't want to run short, so I went with the Rustoleum version. It did what I needed it to do.
No unwanted paint lines when forming the butt joint panel lines. When forming the fuselage overlapped panel lines, yes, had a few, but of minimal thickness. A bit of light sanding with anything over 400 grit took off the difference. Then when spraying the next line, I'd get as close as I could to the previously painted line, once and very lightly - enough to hide pencil marks and blur the difference between where the old tape had been and the new paint line being formed. 2nd and 3rd coats creating the new line were kept closer to the new line. It seems to have all blended well. A final wet sand, I think it will be fine, I'm sure, as even now, there is nothing I can see or feel where an unwanted line had been.
To be clear, these unwanted lines were very faint to begin with - it's not like I produced a a full, 3-coat line as a mistake and then tried to get rid of it. However the filler/primer I used is very sandable - I expect that I could remove such a fully formed line if I had to.
Rivets: I'm using Mirce's details: NS Modelers - Detail set for F6F Hellcat This is a 1/5.3 scale (Zirolli) set. However, Mirce offered to produce the panel details in 1/6 scale for my order. Also, the number of rivets in the kit are a minimal amount. 5104 came with the kit. I ordered another 10,000 and I've got about 5800 left to complete the fuselage, trim tabs and canopy - I may have enough to be good enough. It will be close, but I think I will be short and will need to order another sheet, maybe two (2552/sheet; really, that's not close - a hundred would be close!). Various screw sizes are included in the kit - I think there is more than enough of these.
Well, on to my next problem - my Garmin Zumo XT just died. I couldn't shut it off and when I took it off my moto it went and stayed dark. Ugh! Always something. It has screws. Perhaps there is a blown fuse under the cover...simple would be nice.
The following users liked this post:
G.F. Reid (06-01-2024)
06-01-2024, 06:01 PM
#380
Well, thanks for the advice regarding the paint. It was an idea but after you're reading your post I might just go back to the Dolphin putty. It's a great product but the mixing ratio is 100 to 1 and difficult for me to estimate by eye. When I was using it, either set too fast to get hard in a couple of swipes, or it will still be pliable by the next morning and have to be scraped off with a razor.
The nice thing about it is that it's brushable up to the time it sets.
The nice thing about it is that it's brushable up to the time it sets.
 06-02-2024, 04:59 PM
#382
Thread Starter
Does the Dolphin Putty sand easily?
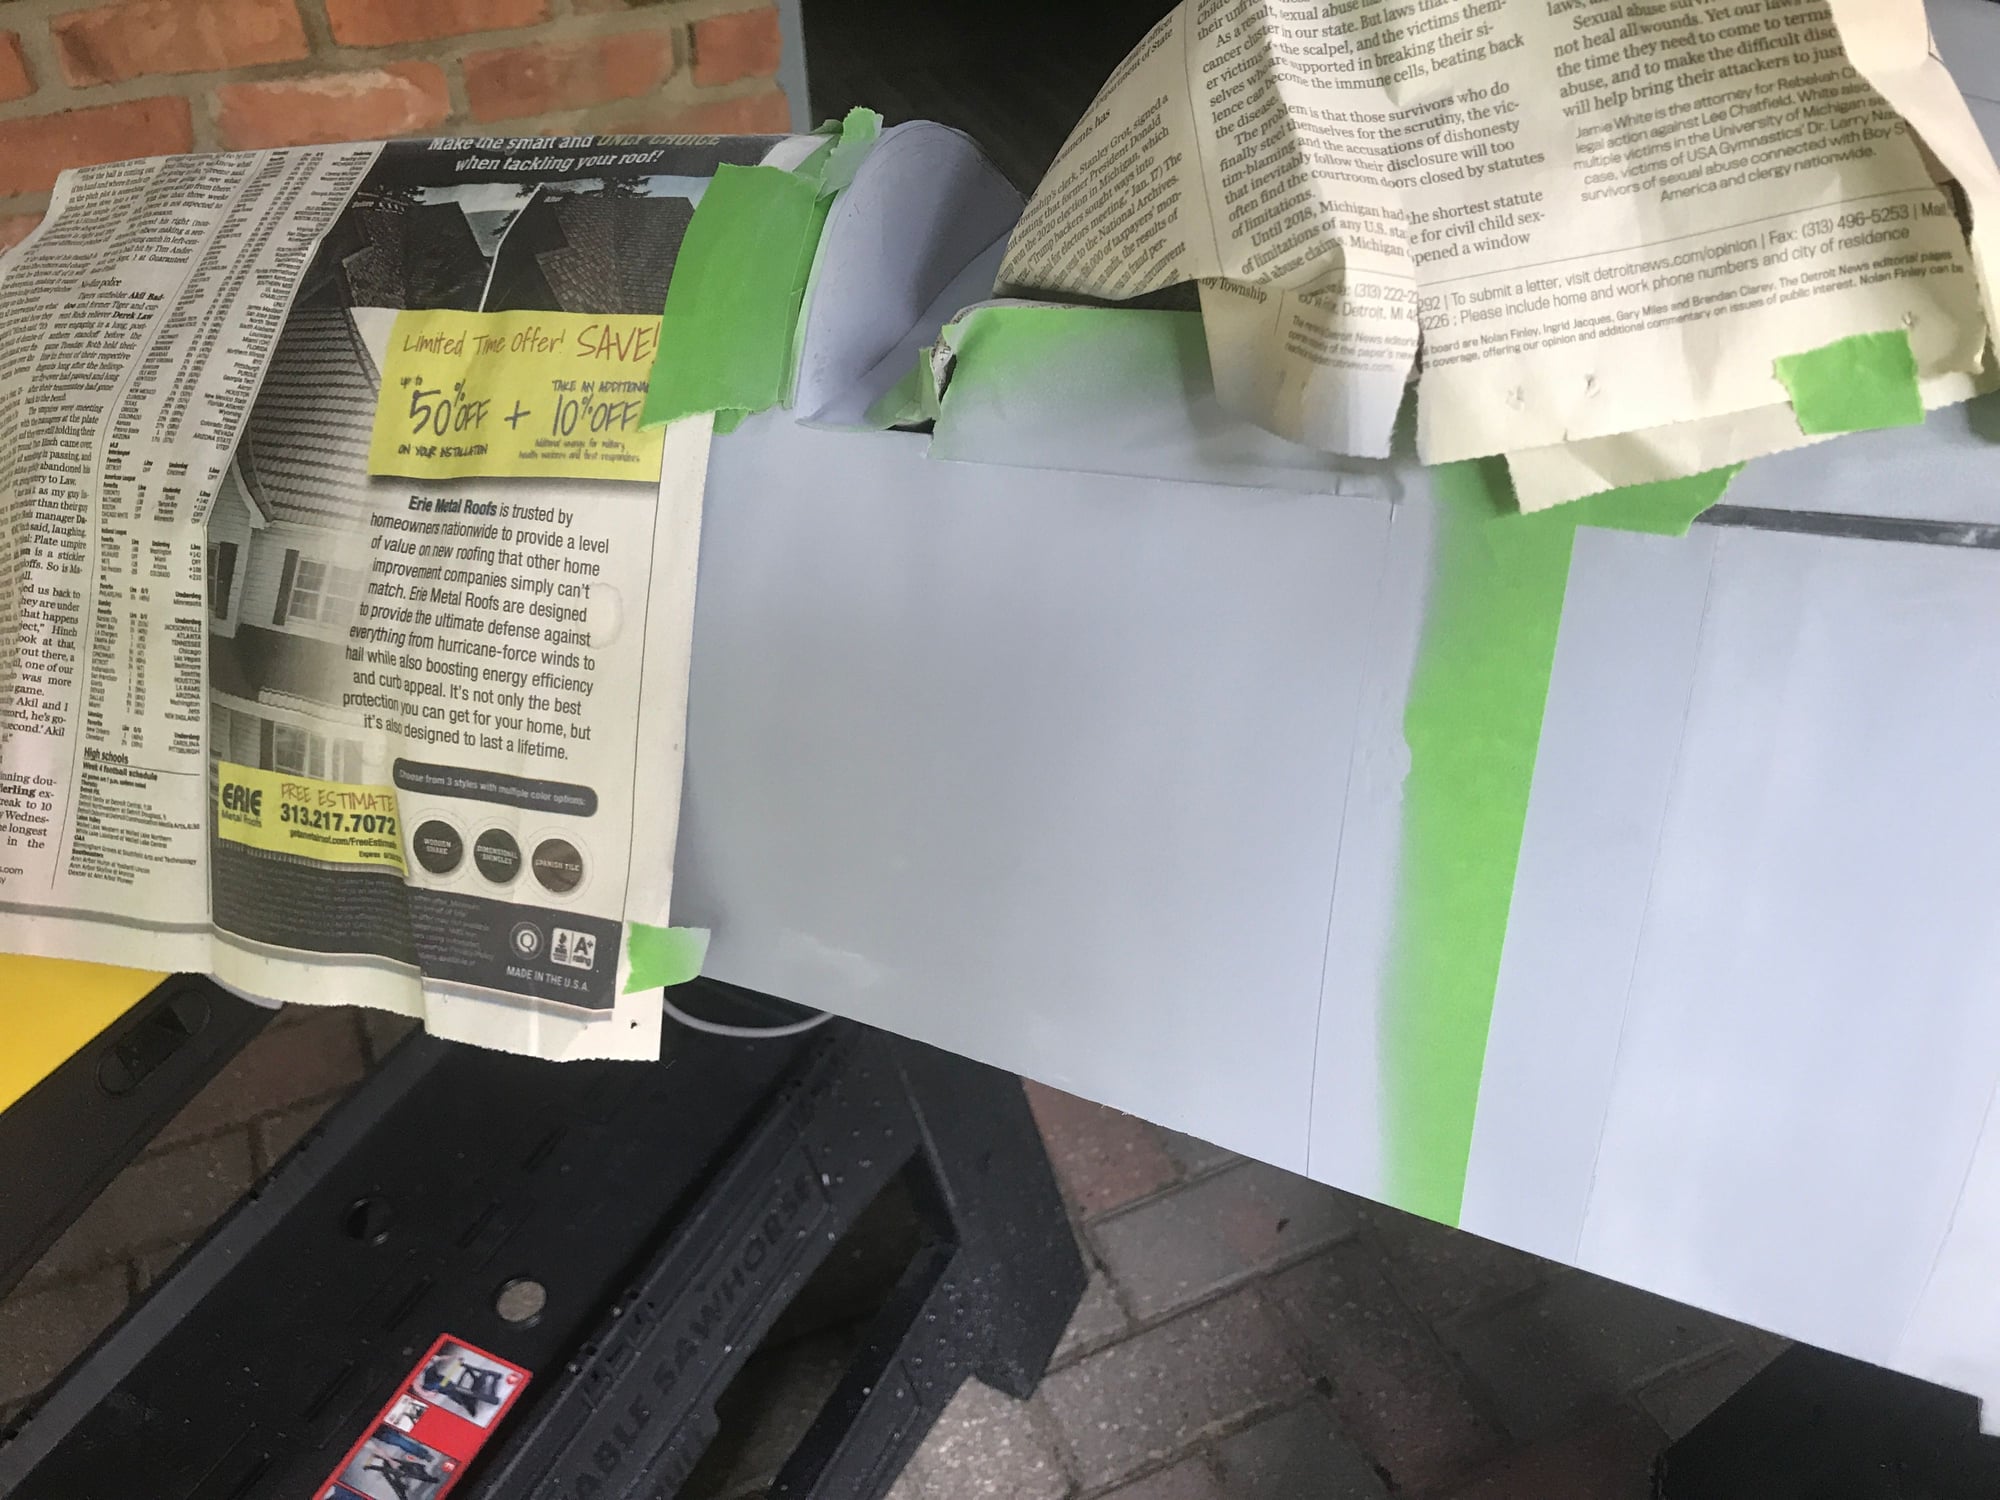
Please note that I was lazy with my masking. I just held a piece of cardboard next to the tape, blocking the overspray. I could have masked better, but any little bit that got through was so easy to clean up, that I just kept going.
And, I got my Garmin Zumo XT running again. Apparently a locked up, black screen is a known condition. Holding the On button for 30 seconds causes a hard reset - low and behold, it works!
06-02-2024, 05:22 PM
#383
Good eye!
Right, Ziroli so-called Grand Scale 72" T-bolt. At the time he said he was going to design a few more in that size, between your average 60 size warbird in the larger 80 to 90 inch birds that he normally designs..
I got templates, rib and former patterns and I can't remember what all else from Chad Veich over 20 years ago. Framed it up sheeted it and got it to practically the state it's in right now and got burnt out on the hobby for what I thought would be for a short while but turned into more than 20 years.
I don't know if I'll ever fly but I'm determined to at least finish it.
06-04-2024, 04:29 PM
#385
Thread Starter
Good eye!
Right, Ziroli so-called Grand Scale 72" T-bolt. At the time he said he was going to design a few more in that size, between your average 60 size warbird in the larger 80 to 90 inch birds that he normally designs..
I got templates, rib and former patterns and I can't remember what all else from Chad Veich over 20 years ago. Framed it up sheeted it and got it to practically the state it's in right now and got burnt out on the hobby for what I thought would be for a short while but turned into more than 20 years.
I don't know if I'll ever fly but I'm determined to at least finish it.
Right, Ziroli so-called Grand Scale 72" T-bolt. At the time he said he was going to design a few more in that size, between your average 60 size warbird in the larger 80 to 90 inch birds that he normally designs..
I got templates, rib and former patterns and I can't remember what all else from Chad Veich over 20 years ago. Framed it up sheeted it and got it to practically the state it's in right now and got burnt out on the hobby for what I thought would be for a short while but turned into more than 20 years.
I don't know if I'll ever fly but I'm determined to at least finish it.
Glad we are both working to finish what we started. I expect to have someone else fly my bird, at least until I get enough flight time in to take up the stick myself. If it doesn't fly, it's just a model. If it flies, it's an airplane. At least so I've heard.
On to the end! I need some more fighter type planes that I have little invested in, such that I can practice without the nerves playing such a large role...
The following users liked this post:
G.F. Reid (06-05-2024)
06-05-2024, 11:28 AM
#386
Thread Starter
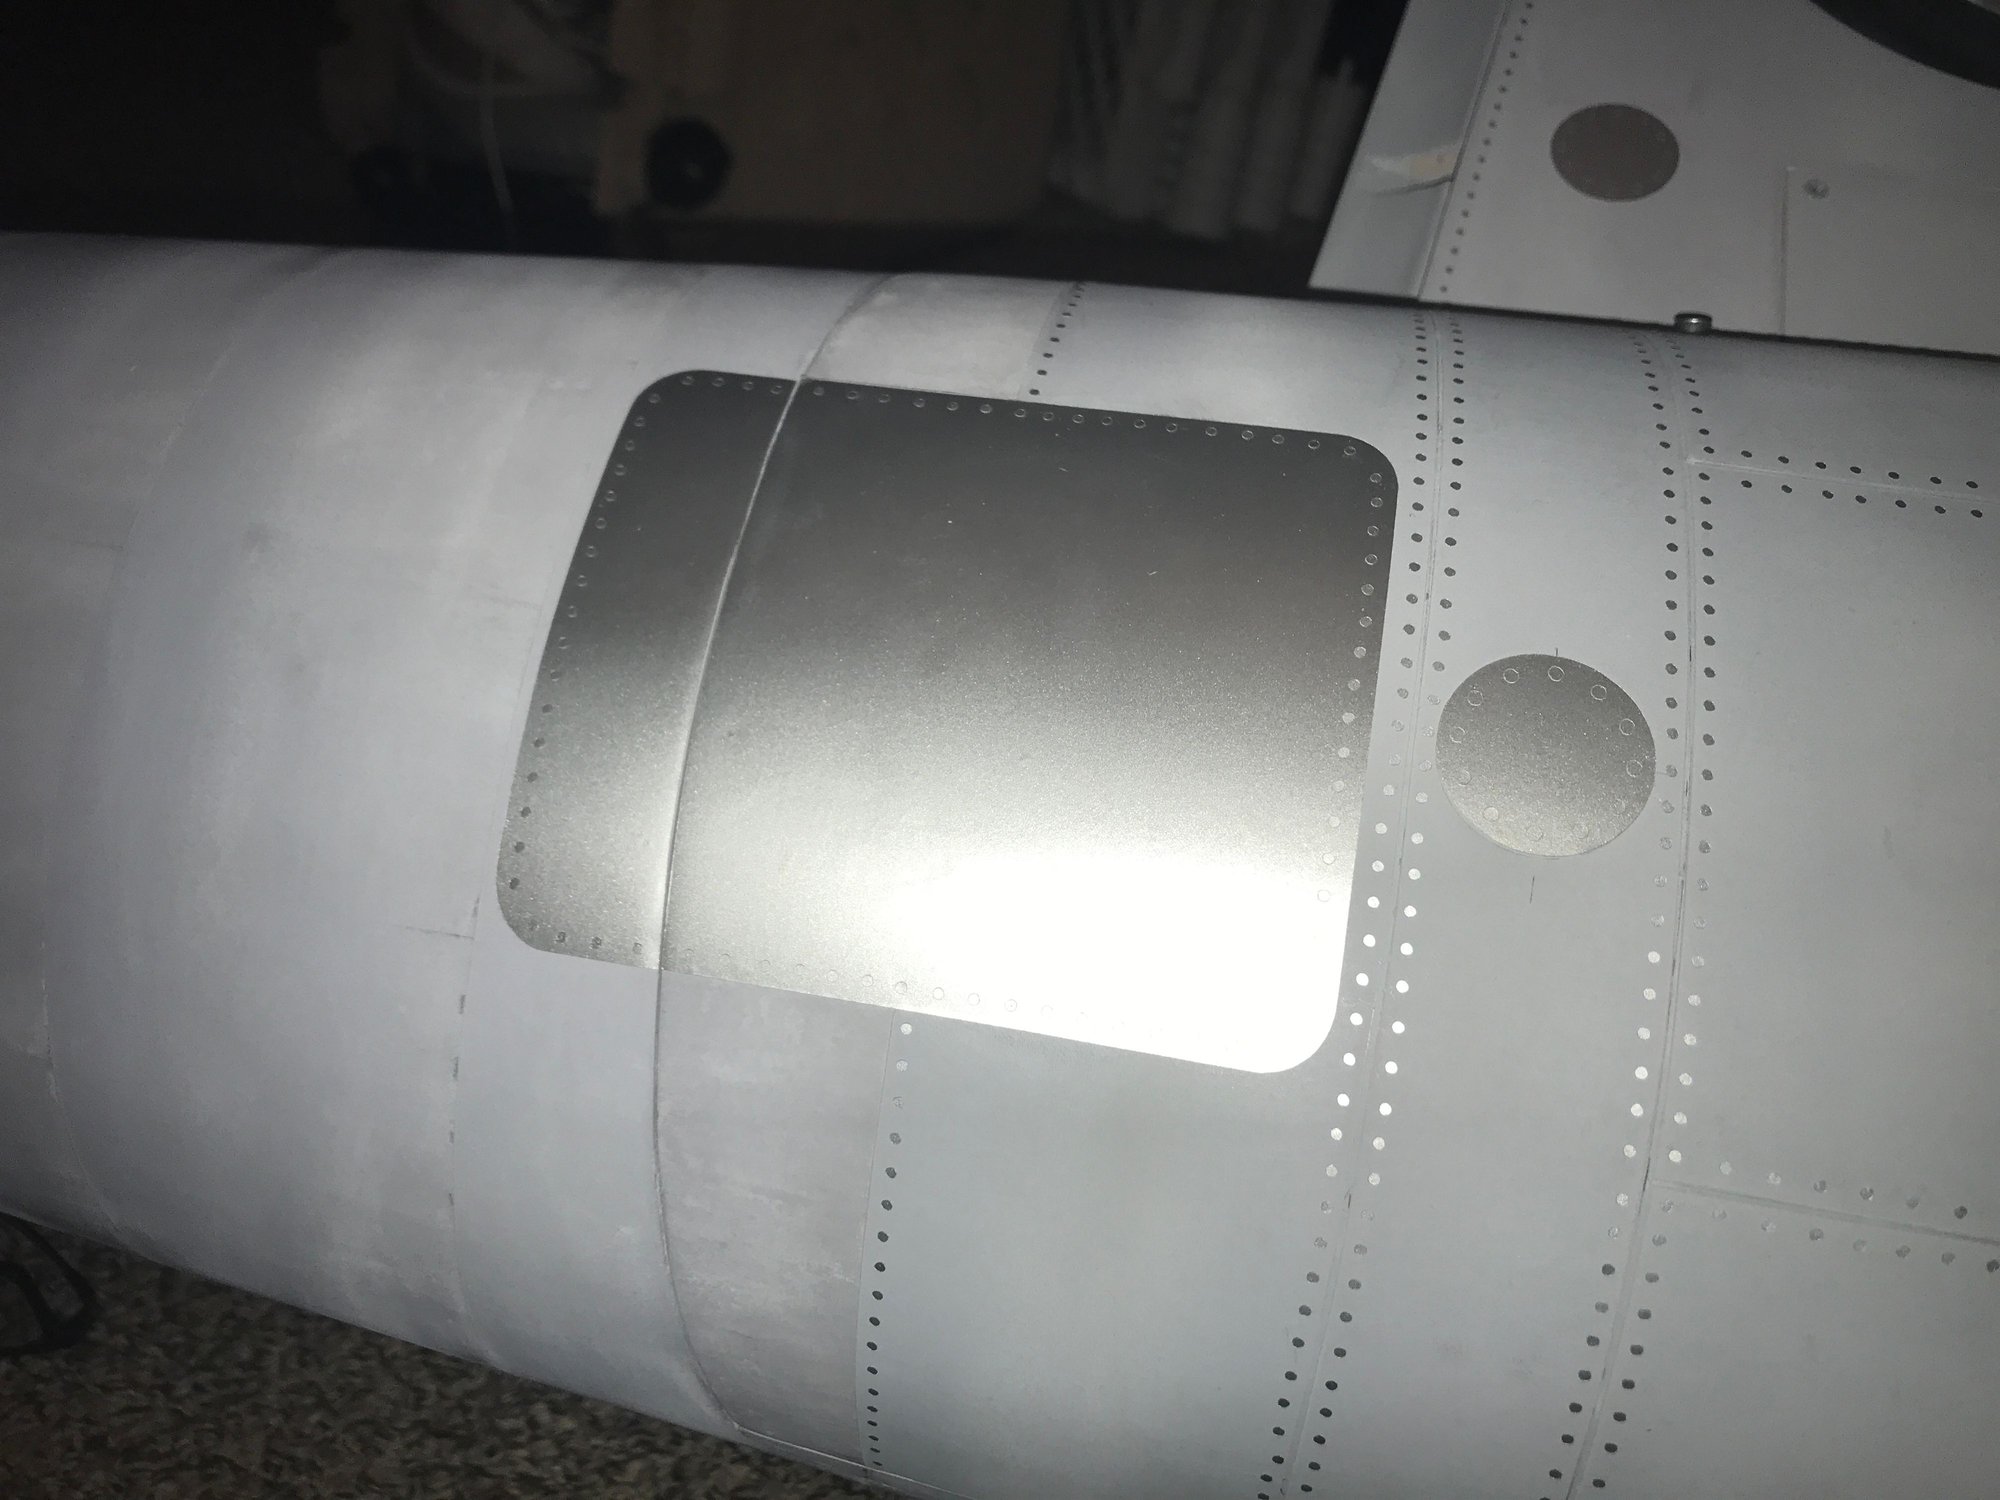
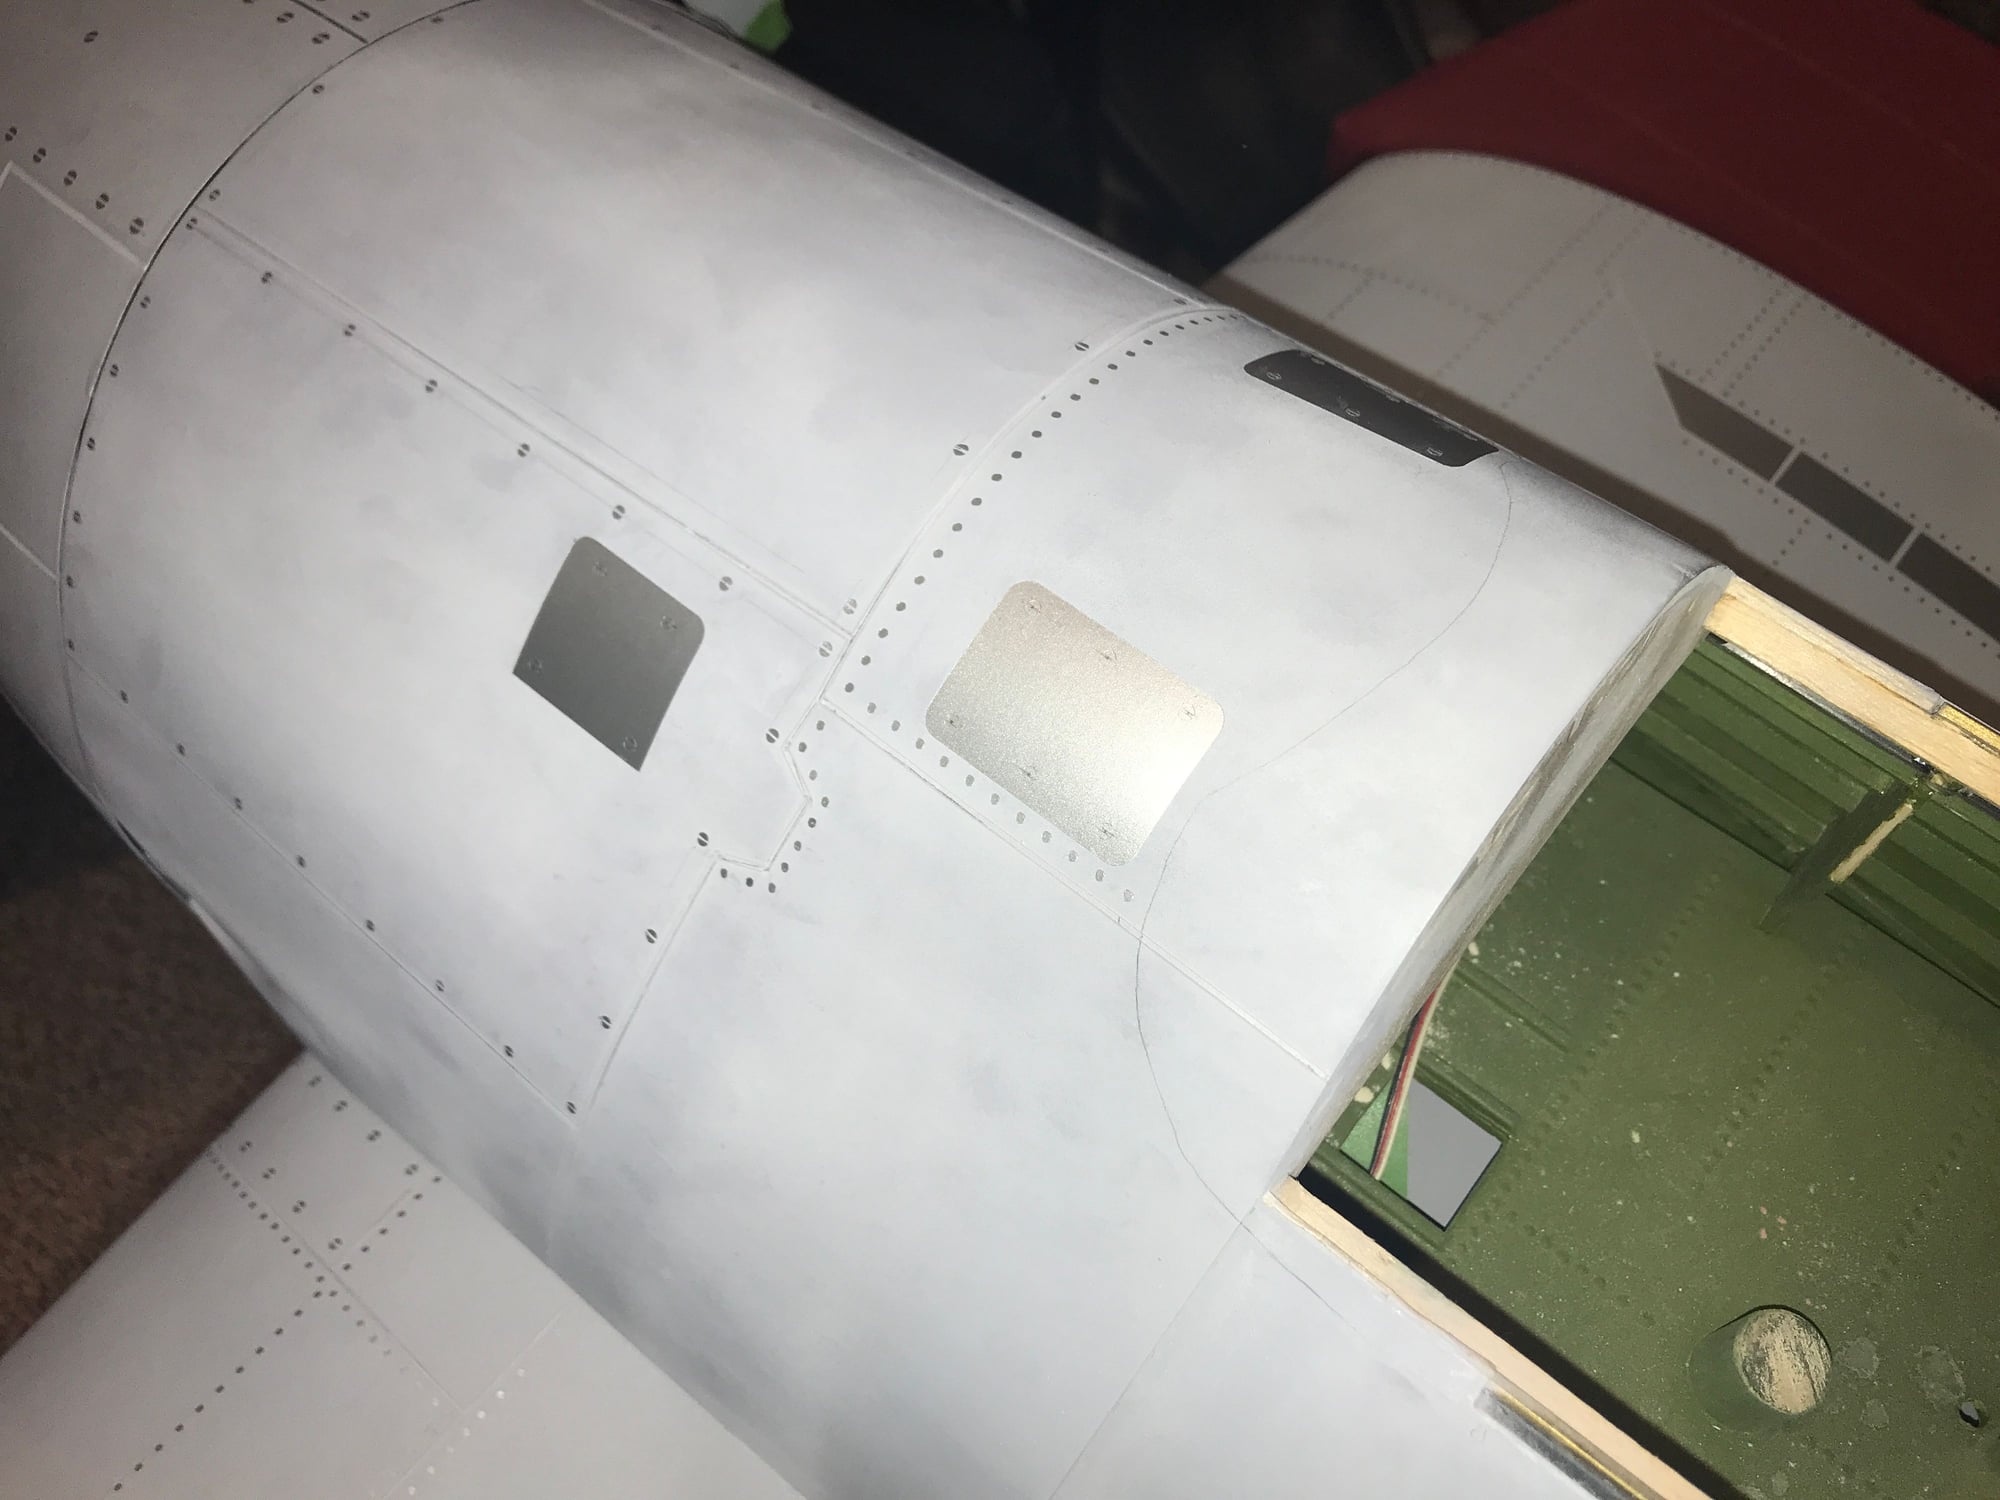
Fuse details started! Not much, but I think this is the last of the big details to apply, though it is the back portion of a panel that mostly reside on the belly pan. Since it was the last "big" piece, I had to start there. The rivets are not part of the panel detail - these I added after seeing them in other drawings, pictures. Next, I think I'll do the screw fastener details at the nose and tail cone - more impact for less work, which will help give me more incentive to push through the rivet process.
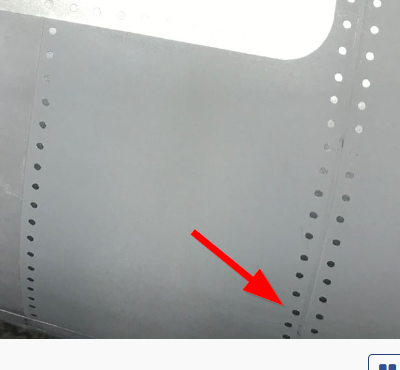
Oops! Can you find the improperly positioned rivet in the photo? Easily corrected but something I always need to watch out for and correct before final paint.
Oops! Can you find the improperly positioned rivet in the photo? Easily corrected but something I always need to watch out for and correct before final paint.
The following users liked this post:
G.F. Reid (06-05-2024)
06-06-2024, 07:34 PM
#388
Thread Starter
Here it is:
There's another one that looks like it's missing, but it's just the lighting.
Continuing to add screw, rivet and small panel details to front of fuse. Drawings show to panels in front of the canopy, but the detail kit only included one. I had some leftover material from some center wing section panels that I decided not to use (I recreated them with ChartPak tape and paint, instead) and cut a second panel, adding screw details to both.
Screw details added to panels in front of canopy.
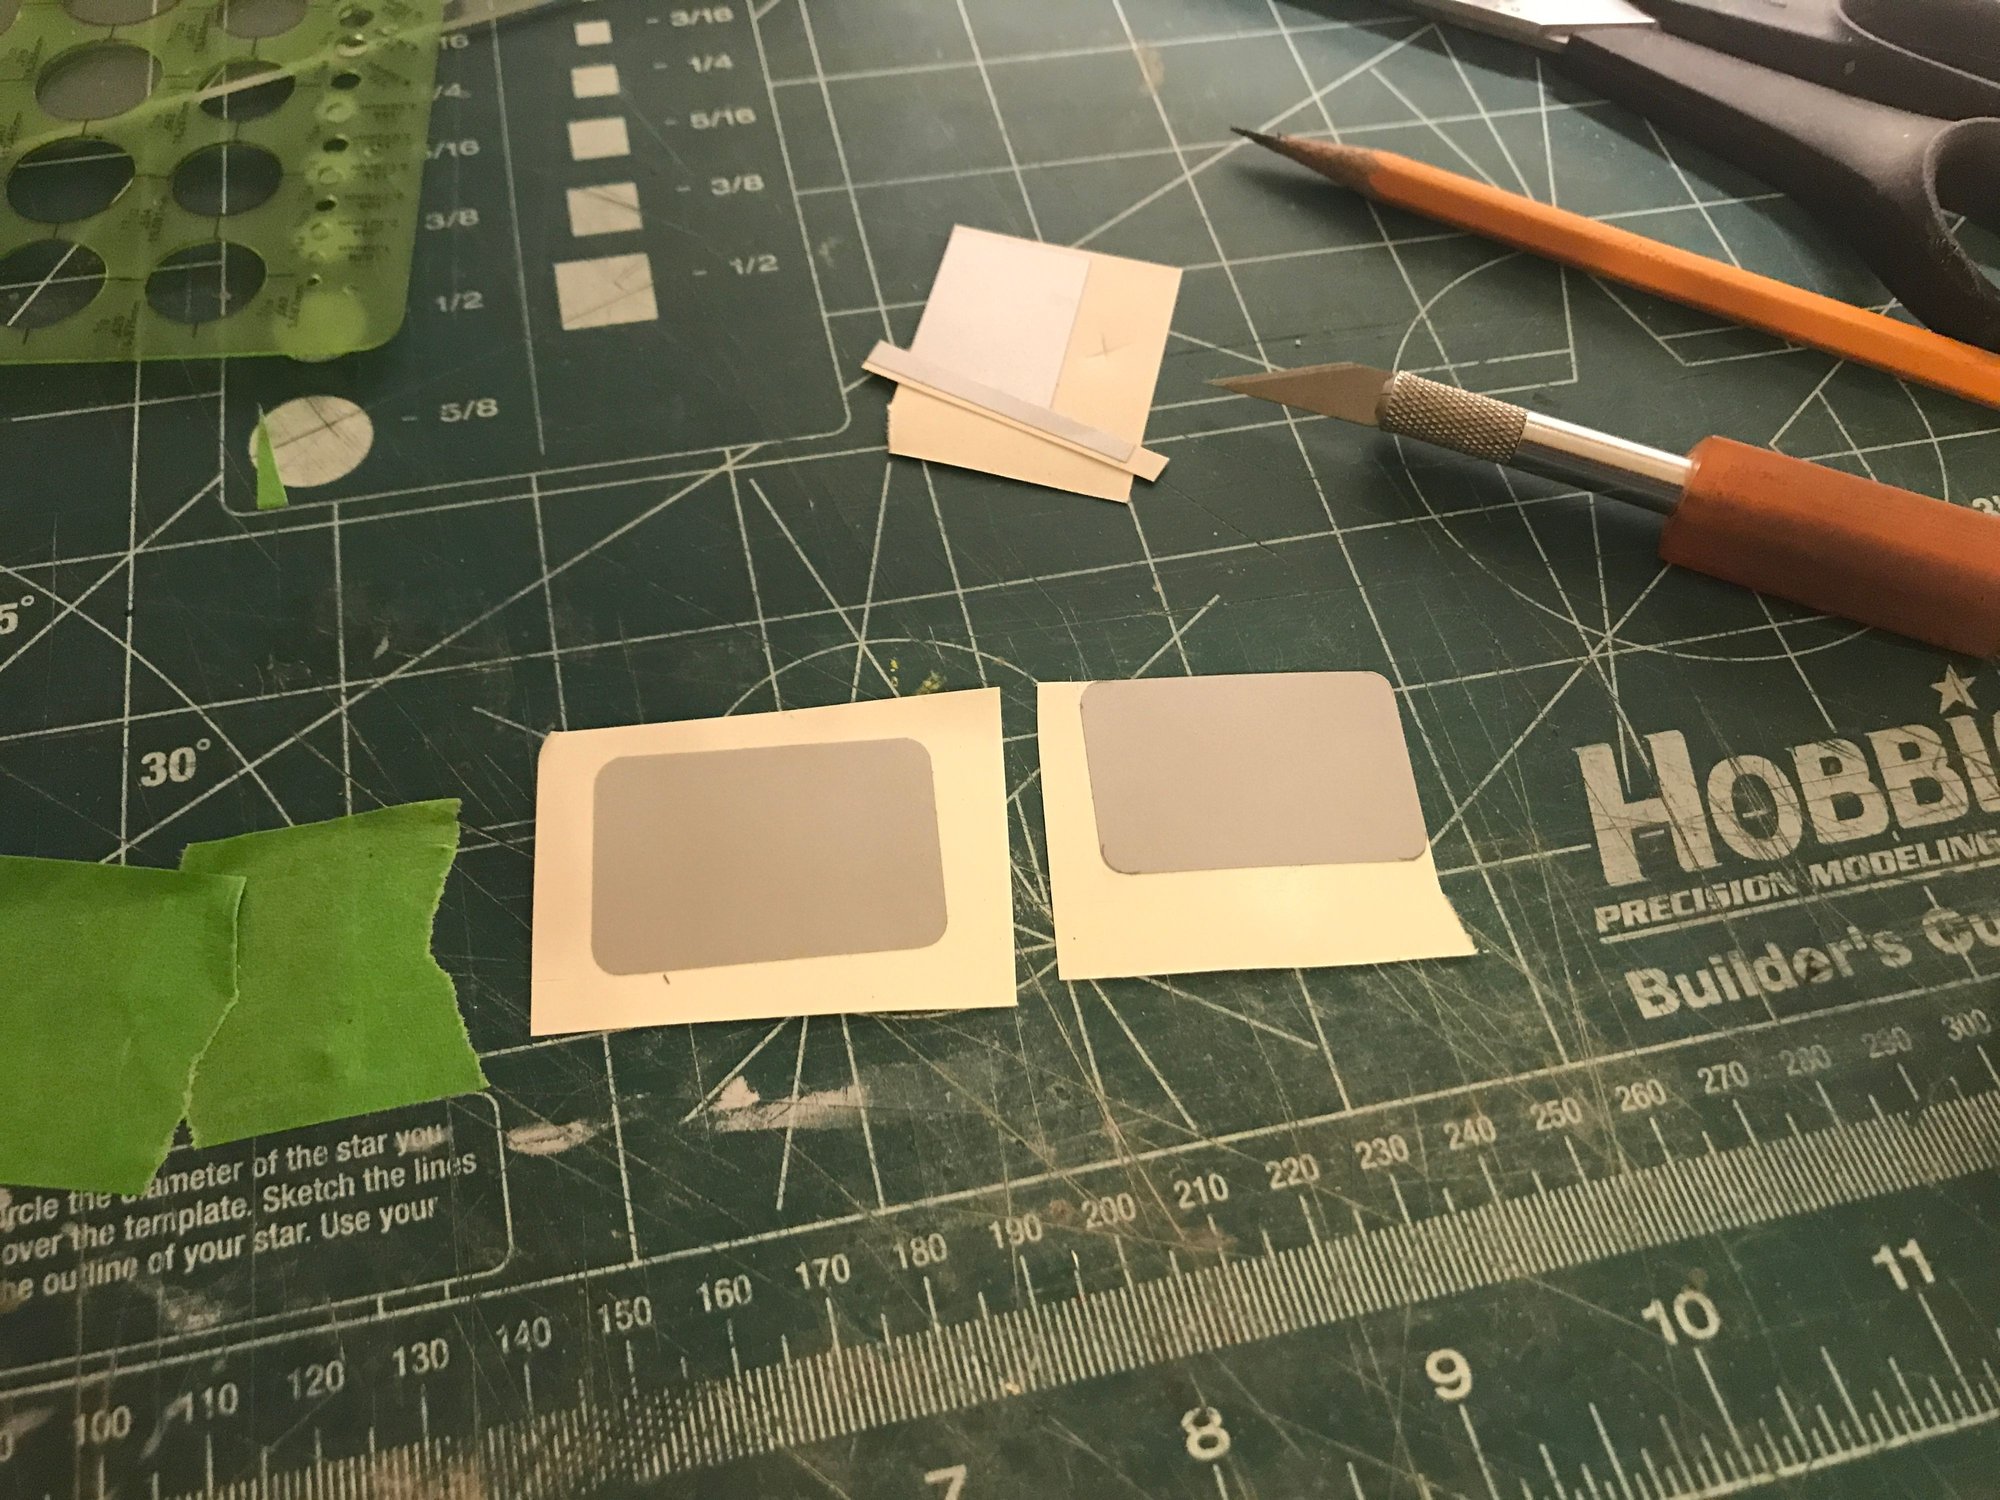
Left panel from detail kit; right panel cut from a detail I decided not to use. The material cuts very well with a new knife.
There's another one that looks like it's missing, but it's just the lighting.
Continuing to add screw, rivet and small panel details to front of fuse. Drawings show to panels in front of the canopy, but the detail kit only included one. I had some leftover material from some center wing section panels that I decided not to use (I recreated them with ChartPak tape and paint, instead) and cut a second panel, adding screw details to both.
Screw details added to panels in front of canopy.
Left panel from detail kit; right panel cut from a detail I decided not to use. The material cuts very well with a new knife.
 06-07-2024, 08:08 AM
#390
Thread Starter
So, regarding removal of a completed panel line.... Yep, I have found a couple near the cockpit that are misplaced. A pair of lines on each side of the cockpit which should coincide with the front and middle frames of the sliding canopy are off. I'll be sanding these off and redoing them in the right position. Though using multiple sources and I'd prefer to blame a source, I probably transferred one line incorrectly (locating it at the IP) and then split the difference for the middle line between the IP and the rear of the cockpit. I'll do pictures when I tackle the work and report on how removing a fully completed, painted panel line goes. Thankfully, these are some of the easiest to repair.
The following users liked this post:
G.F. Reid (06-08-2024)
06-08-2024, 07:30 AM
#391
Thread Starter
I agree. On the right airplane, there's nothing better. The P51 looks really nice.
The following users liked this post:
G.F. Reid (06-08-2024)
06-08-2024, 11:06 AM
#392
Thread Starter
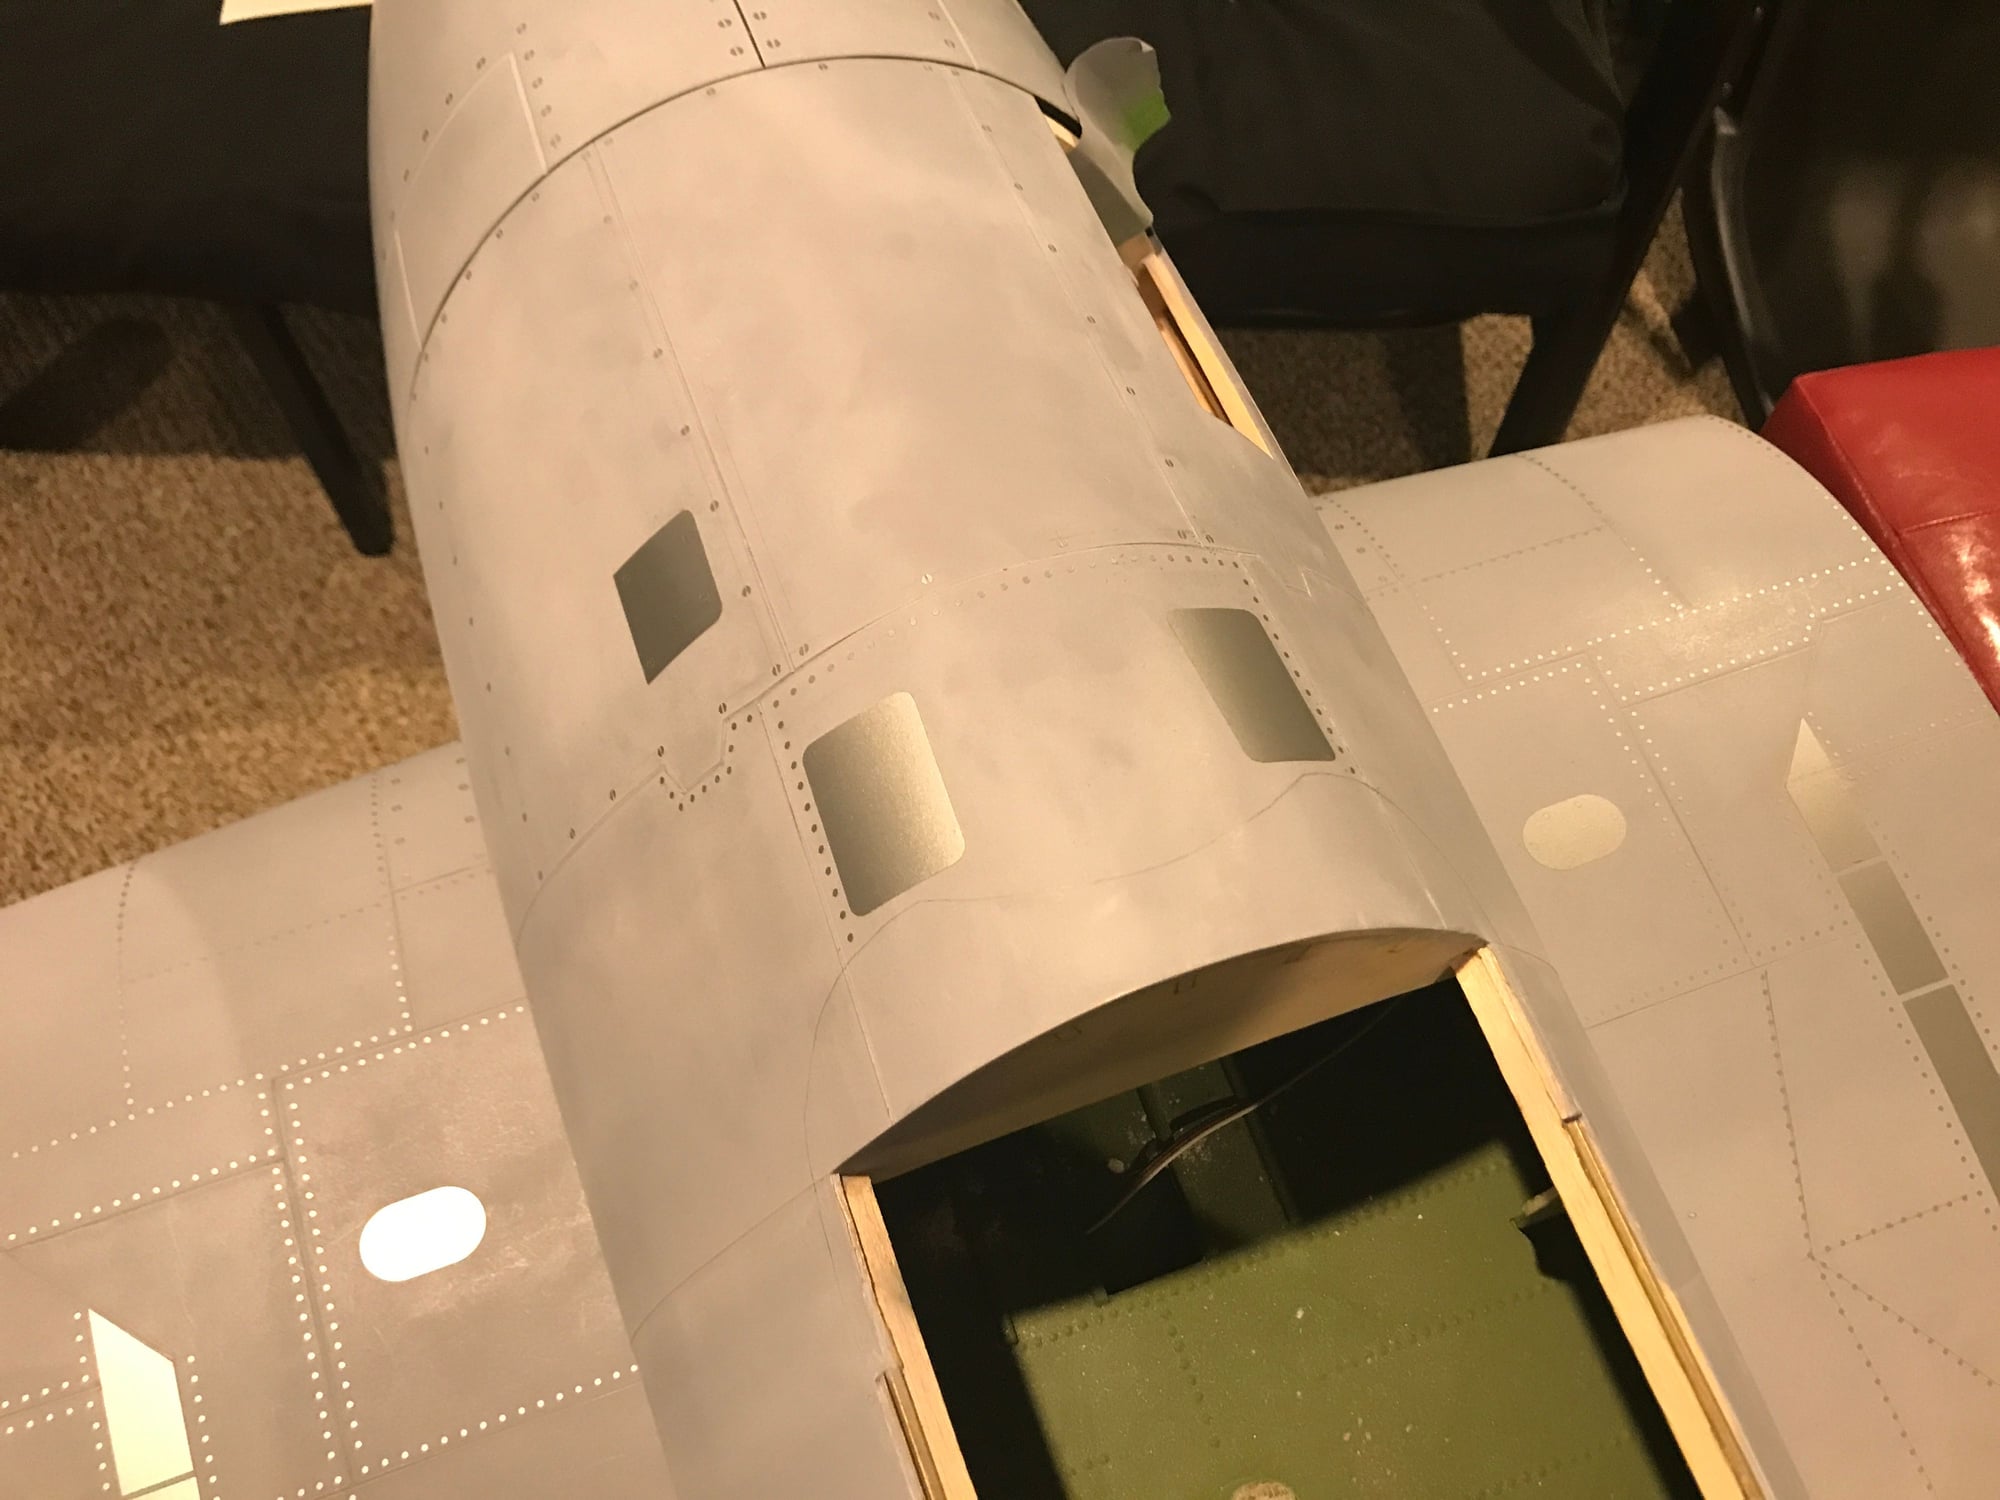
Incorrectly located panel lines removed with surface ready for new lines. Will make sure to locate them correctly. Removing the painted panel lines went smoothly. Started with a 120 grit sand paper to get the thickest areas removed, followed by 150 grit and then 400 grit. Easy-peasy. Regret having to do this over, but glad I caught the error before having all the details in place.
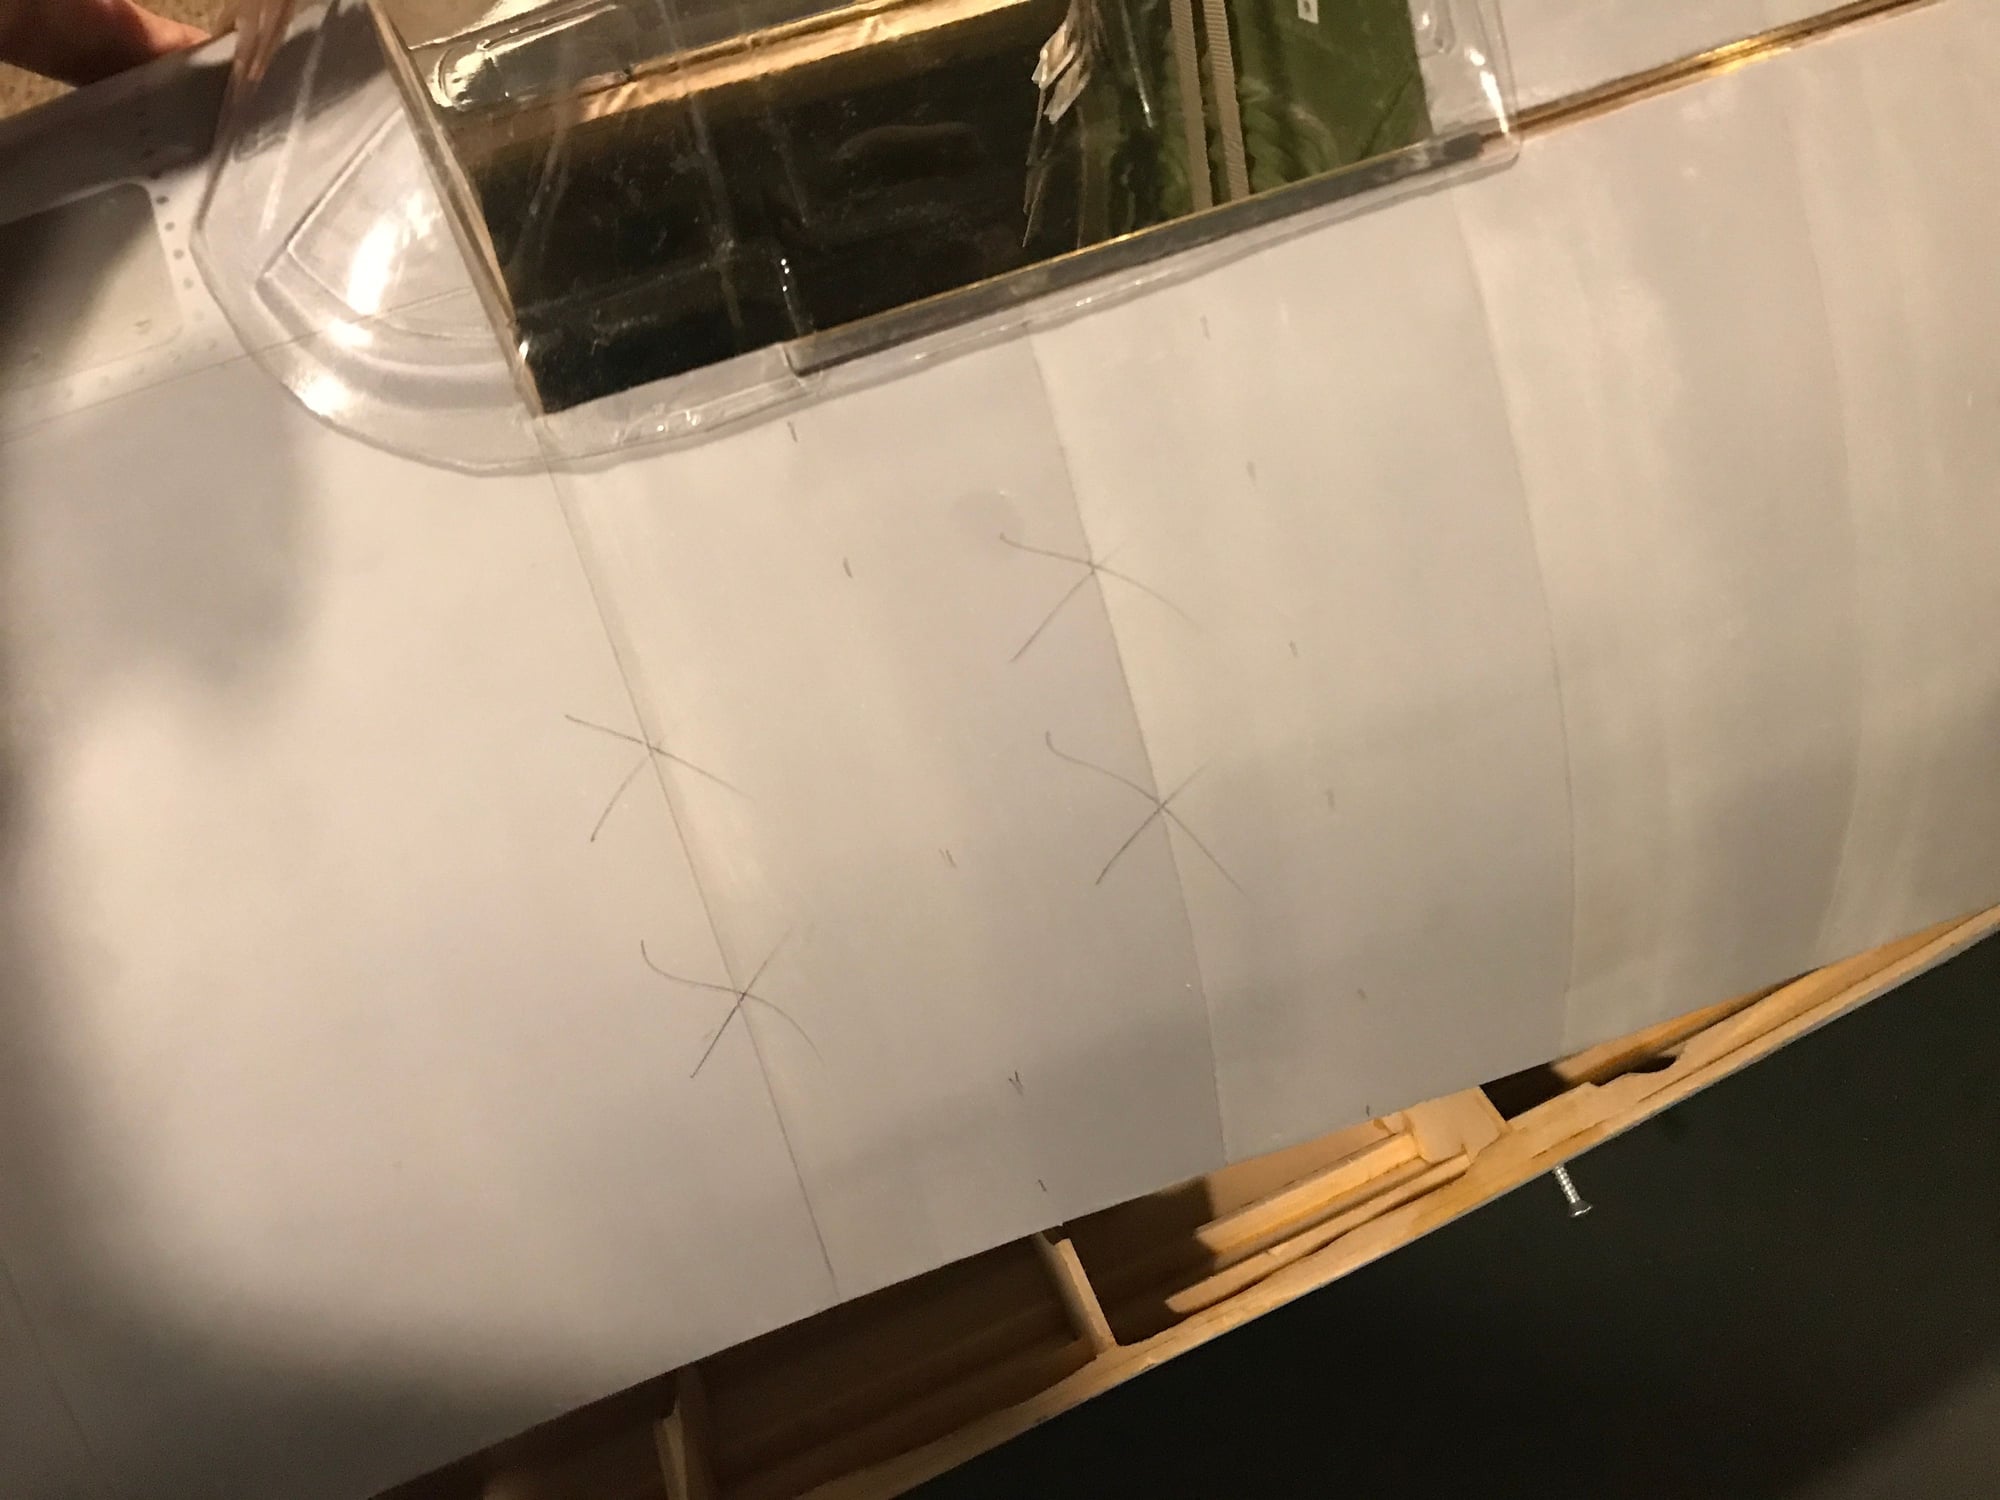
X's mark panel lines in wrong location. Dashes indicate where they should be.
Incorrectly placed panel lines gone!
Ready for laying down some new lines in the correct location.
X's mark panel lines in wrong location. Dashes indicate where they should be.
Incorrectly placed panel lines gone!
Ready for laying down some new lines in the correct location.
The following users liked this post:
G.F. Reid (06-12-2024)
06-14-2024, 06:04 PM
#393
Thread Starter
More rivets! I like doing the rivets a lot more than the screws - just draw a line, pick up a row of rivets with the transfer tape and apply. Also, the rivets are much easier to reposition, if necessary, than the screw details. Though I have a several screw details left to apply to the nose section, I'm focusing on the left side rivets, now. I think I have enough rivets to complete the left side and then I can calculate if I need more and how many for the right side. I have plenty of screw details - no need to order more.
I've gone through 10.5k rivets and have 4.7k left.
Also, replaced the rear brake pads on our Jeep. Front pads still have a ways to go so no rush, but I have the parts. Tractor needs an oil change. Always something!
I've gone through 10.5k rivets and have 4.7k left.
Also, replaced the rear brake pads on our Jeep. Front pads still have a ways to go so no rush, but I have the parts. Tractor needs an oil change. Always something!
The following users liked this post:
G.F. Reid (06-15-2024)
06-17-2024, 12:50 PM
#395
Thread Starter
And more rivets....
All the vertical rivet lines on the left side of the fuse are done. There are 11 lateral lines from the wing trailing edge back toward the tail. I'm doing 7, for sure, with 2 of the 7 completed, and the remaining lines are penciled in. All left side panel details from Mirce's kit have been applied. I even added rivet details around the 4 circular access covers at the tail, and along the inside edge of the small access cover at the tail cone.
Vert. and Horz. stabs, I've not started on. Also, a few screw details to add to the nose and tail.
Perhaps 75% done with the left side fuse? And, I still need to fix the curvature of my elec/pneu controls access cover before starting the right side. I also don't have a means to keep the cover closed. I'd like a latch of some sort but haven't found any that are unobtrusive to the look of the plane. Toying with magnets and maybe a small bit of aluminum attached to the underside of the cover, with a bit bent outward that I can grab with my fingers to open. Not an unobtrusive idea, but much less so than anything I've seen so far.
In the 90's here this week, so a good time to apply rivets while in the cool basement.
06-18-2024, 02:12 PM
#397
Thread Starter
I may have Job beat...there is debate as to whether he suffered a week or several months. I'm into several years, though I'm sure my degree of suffering is much less than Job's, even if much longer! I do seem to have a knack for focusing - before I retired, working from home during lockdowns, my wife came back from a walk and said, "You haven't touched your coffee" She had placed it next to me and left for a 40 minute walk - I never saw it until she mentioned it. Focused or oblivious? Perhaps both!
Thanks, though - I appreciate the comment!
Alright, I may be posting a number pictures recently, but I think this one, below, is a milestone, sort of. Left fuse detail is complete! And, starting the left side of the vert. stab.
Got the tractor oil and filter change done, so it's time to estimate how many rivets I'll need to complete the job and get an order into Mirce. I don't know how old he is, but at my build rate I need to be concerned about his eventual retirement!
Yesterday, 07:40 AM
#399
Thread Starter
Thank you!
Ordered another 5k rivets. This is more than twice what I need to finish the job - better to have extra than not enough. If I wanted to do every single rivet, I'd need another 10k. Each sheet has 2552 rivets. Kit came with 2 sheets and I've ordered 6 extra in total, for 8 sheets or 20,416 rivets. I think I'll be around 17.5k when I call it quits and have 1 sheet left for my "may use it someday" collection.
Ordered another 5k rivets. This is more than twice what I need to finish the job - better to have extra than not enough. If I wanted to do every single rivet, I'd need another 10k. Each sheet has 2552 rivets. Kit came with 2 sheets and I've ordered 6 extra in total, for 8 sheets or 20,416 rivets. I think I'll be around 17.5k when I call it quits and have 1 sheet left for my "may use it someday" collection.


